Jump to content


Gump's Universal K'NEX Coaster System

contest nolimits roller coaster simulator

  • Please log in to reply
34 replies to this topic

#1 Jogumpie

Jogumpie

    Living through the great Gump hiatus...

  • 13586 posts

Posted 20 November 2011 - 11:59 AM

For my megalooper and other future projects I am working on an Arduino-based system like Max's. Personally I find functionality more important than the looks, so the universal functionality of this project (it should be able to be used in every K'NEX coaster) is the most important. Features that will be present in this system are:
  • The ability to power up to 16 K'NEX motors (12V), in both directions. Fourteen of these will have speed-control, too. The other two are just on/off in both directions.
  • Up to 20 reed switches, although I keep the option to expand on this, if needed. These are ordinary on/off switches that make contact when a magnet is present within their range.
  • 5 servo motors, with high torque. They can be used for special things like tilt coasters, but will mainly be used for turning the brakes on/off.

First, I will show you the circuit I have for the K'NEX motors.

Posted Image

You see a couple of pin headers, the arrays with 6 holes each. The one on the most-left will get power from the PSU (computer power supply) in the form of 2 lines for 12V, 2 lines for 5V and 2 lines for ground. The jumper wires across the board distribute these lines over the 8 chips you see. These chips are L293D's, which are ideal for low-power motors like the K'NEX ones. Every L293D can power two motors, so the total comes up to 16 motors. Every pin header is dedicated to one motor and will hold input (from the Arduino) and output (the cable to the motor) of one motor.

Posted Image

This is the backside of the board, containing all the soldering that was necessary for distributing the power lines.


Now on to the next part, the reed switches.

Posted Image

Reed switches usually come in a glass housing, but these are fragile and since this system will be universal, components cannot be fragile. So I chose for reed switches in a plastic housing. After some testing I came up with a 'module' that can easily be installed in the track.

Posted Image

The 'module' consists of 4 K'NEX pieces, with the reed switches taped to the orange connector. It is a bit off-centered and doesn't interfere with chains. This means I can also put it anywhere on the lift, if I want (and I will want that for initialization purposes).

Posted Image

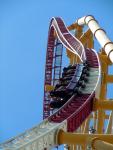
It is important that a magnet comes within about an half inch range, to sense a train's presence. Above picture shows that I will put one small cube magnet on every car, plus on the front car's nose. The magnet on the nose is held there by another magnet inside the nose. The other magnets stick to the screws in the SS cars. How simple do you want it?

Here is a test video of one front car passing over a reed switch. An LED on the Arduino lights up when a magnet is present. The front car contains two magnets, as I said before, so the LED lights up twice per passing. The switches respond very fast, so they will even read the train's presence at high speeds.


The last functional part for now is the use of servo motors. I don't have footage of this, but I have tested all 5. They will have to be adjusted for every coaster they will be integrated in, so I don't expect much visual footage of these. The electrical circuit for them is nothing special, just a 5V line, a ground line and a signal directly from the Arduino.


This is it for now. For now I will work out separate modules for the different functionalities, but everything will be integrated in the Arduino and the board that currently features the K'NEX motor circuit. Then everything will be integrated in a control box with all in- and outputs ports on the back. I can already tell you it won't feature different buttons for gate opening/closing, dispatching, etc. This is not what I am interested in. I will, however, have a button for on/off of the whole system and a button for initialization of the system.

Thanks for reading and stay tuned!

Edited by Jogumpie, 04 September 2013 - 02:27 PM.


SSCoasters Administrator
The SSCoasters Forum Rules
DD_signature.jpg
YoutubeButton.pngFacebookButton.png


#2 A.S.C.

A.S.C.

    -----------

  • 801 posts

Posted 20 November 2011 - 12:47 PM

Nice! This looks good :)


#3 Dragon

Dragon

    ROAR!

  • 1481 posts

Posted 20 November 2011 - 01:09 PM

Amazing gump!One day when i travel To usa i'll but some eletronics To my coaster (here in Br is expensive)


#4 Maxlaam

Maxlaam

    Tracing Tyrant's Steps

  • 8116 posts

Posted 20 November 2011 - 02:29 PM

I like the new sensor housing. Maybe you should consider using double sided tape or hot-glue to mount them as, though it is a personal opinion, clear tape looks ugly.The magnets are very small which is awesome, and the nose seems like it's made for magnets!

My only critique is that, though I can't quite make it up for sure, some of your solder connections don't look like they are properly made. A good solid solder connection covers the entire square and should look shiny when set.

One way to make sure you get this right is to solder in the right order. Put your tip of the iron on the board then add solder. Adding solder to the tip before putting it on the board will make the flux evaporate resulting in a bad solder connection. After you add the solder leave the tip on the board until the solder managed to flow nicely around the components/wires. This takes about 1 or 2 seconds. Then remove the tip from the board and the solder should set in shiny, well covering, volcano shape cone. If you get a ball shape forming on top of your connection, that means it's a bad connection. You can remove excess solder with a de-soldering pump or by using de-solder litze.

Question, how many magnets do you have?

Edit, here is a nice 'comic' for everyone to learn how to properly solder your components :)

Posted Image


SSCoasters Administrator
Read The Forum Rules(smart)

Posted Image
Posted ImagePosted Image


#5 Jogumpie

Jogumpie

    Living through the great Gump hiatus...

  • 13586 posts

Posted 02 January 2012 - 08:44 PM

So I bought this suitcase to put my whole Arduino system in. The suitcase mainly contains four things:
  • Arduino Mega
  • Circuit board containing circuitry for 16 K'NEX motors, 20 reed switches and 5 servo motors
  • Power supply
  • Storage for extension cables, motors, etc.

Posted Image

The blue device on the left is the Arduino Mega, the microcontroller that will run the Coaster System program. A hole will be made in the suitcase's wall to allow a USB connection. The Arduino is mounted on a plastic holder, that's connected to the case's floor with velcro. This allows for a semi-permanent assembly.
The green plate is my circuit board, containing circuitry for the motors (the left half), circuitry for the sensors (the motherload of resistors and pin headers near the center) and the circuitry for the servo motors (that small island of pin headers on the right). This circuit board fits precisely between the Arduino Mega and the power supply and is held in place by a couple of K'NEX pieces. Again, this allows for a semi-permanent assembly. Right above the red connectors, a hole will be made for all the (motor/sensor) wires that'll come out of the suitcase.
The power supply has its useless wires removed (like the weak -12VDC wire) and the rest of its wires separated in two. The ones I hold in the picture are the ones that I will be using for the Arduino and circuit board. The other ones may be used in the future. Preserving them and directing them away from the main circuitry seemed like a better idea than already cutting them off. The power supply is also connected to the suitcase with some velcro. Another two holes, one for the power cord and one for the fan, will be added to the side of the suitcase.

What's next? Cutting holes. In the meantime I'll have to wait for more cables to come in. There will be a great amount of wires coming out of the case. 16 motors + 20 sensors + 5 servos = 41 cables. I will be using shorter one foot cables for that, which will be connected to the internal circuitry and will partly come out the case. Each cable gets its own label and with the large amount of extension cables I have, I will connect them to either the motors, reed switches or servo motors.

Edited by Jogumpie, 04 September 2013 - 02:30 PM.


SSCoasters Administrator
The SSCoasters Forum Rules
DD_signature.jpg
YoutubeButton.pngFacebookButton.png


#6 Maxlaam

Maxlaam

    Tracing Tyrant's Steps

  • 8116 posts

Posted 02 January 2012 - 09:55 PM

Cutting holes is a breeze with this particular suitcase, I just did the same thing with mine and it appears that the core is actually wood sandwiched between a layer of thin foam on the inside and a decorative "aluminium" sheet on the outside.

41 cables is a lot, do that times 2 and you get the amount of leads, that's 82! Servo cables even have 3 leads, so it's even more!


SSCoasters Administrator
Read The Forum Rules(smart)

Posted Image
Posted ImagePosted Image


#7 Jogumpie

Jogumpie

    Living through the great Gump hiatus...

  • 13586 posts

Posted 03 January 2012 - 11:24 AM

Now that the suitcase has its holes cut in, the hardware side of this project is getting closer and closer to getting finished. Dealextreme is being slow again, so I am still waiting for my servo cables. In the meantime I'll show you the pictures I made today.

Posted Image

Posted Image

Posted Image

Posted Image

Posted Image

Posted Image

Edited by Jogumpie, 04 September 2013 - 02:30 PM.


SSCoasters Administrator
The SSCoasters Forum Rules
DD_signature.jpg
YoutubeButton.pngFacebookButton.png


#8 -=TK=-

-=TK=-

    Building maniacs

  • 2753 posts

Posted 03 January 2012 - 01:04 PM

You did this job really clean so far, and i must say that i really like it what you have now! I hope that you receive your stuff soon :)

-=Tk=-

Posted Image


#9 Jogumpie

Jogumpie

    Living through the great Gump hiatus...

  • 13586 posts

Posted 04 January 2012 - 04:40 PM

Today I cut my power supply wires to the right length and soldered pins to them. I am still waiting for more stuff from China, like shrink tubing. I want to properly insulate all wiring, but since I wanted to test stuff, I am taking a risk and using uninsulated pin ends for the time being. I currently have wiring set up for running 8 motors.

Posted Image

Because the megalooper's lift will run with 8 motors. And testing has shown that everything seems to work fine! I guess I will construct the complete lift again tomorrow and test the motors on the monster.

Posted Image

Edited by Jogumpie, 04 September 2013 - 02:31 PM.


SSCoasters Administrator
The SSCoasters Forum Rules
DD_signature.jpg
YoutubeButton.pngFacebookButton.png


#10 MrRemcoStyle

MrRemcoStyle

    dream'n

  • 378 posts

Posted 04 January 2012 - 04:56 PM

WOOOW!!! Dude your amazing wath you can do with electronics man
and for a lang car you need much motors he? 8motors PERFECT!

Best Remco

Posted Image


#11 Britfag

Britfag

    Everybody's Russian!

  • 3818 posts

Posted 06 January 2012 - 05:25 PM

I really can't wait for my electronics to be done D:
I don't mean to sound obnoxious or arrogant, as I really am impressed by the number of people taking this up, but I'm so used to custom PCB's it's weird to see all this customisable Arduino board, with wire-links above the surface.
But none-the-less I'm really impressed, I love how everyone if bringing their own little bit to the whole computer-control idea.

P.S. Oliebollen were awesome. :)


#12 Maxlaam

Maxlaam

    Tracing Tyrant's Steps

  • 8116 posts

Posted 09 January 2012 - 09:39 AM

I really can't wait for my electronics to be done D:
I don't mean to sound obnoxious or arrogant, as I really am impressed by the number of people taking this up, but I'm so used to custom PCB's it's weird to see all this customisable Arduino board, with wire-links above the surface.
But none-the-less I'm really impressed, I love how everyone if bringing their own little bit to the whole computer-control idea.

P.S. Oliebollen were awesome. :)


You etch your own PCB's?


SSCoasters Administrator
Read The Forum Rules(smart)

Posted Image
Posted ImagePosted Image


#13 Britfag

Britfag

    Everybody's Russian!

  • 3818 posts

Posted 10 January 2012 - 04:26 PM

You etch your own PCB's?


I only every did electronics in school, and as part of the Syllabus they have to either supply a CNC Miller to mill PCB's or a Bubble-Etch tank, and I've gotten pretty fond of etching.

Not to sound dickish, but I just never see homebrew electronics.

Project looks good though :)


#14 Maxlaam

Maxlaam

    Tracing Tyrant's Steps

  • 8116 posts

Posted 10 January 2012 - 05:10 PM

I only every did electronics in school, and as part of the Syllabus they have to either supply a CNC Miller to mill PCB's or a Bubble-Etch tank, and I've gotten pretty fond of etching.

Not to sound dickish, but I just never see homebrew electronics.

Project looks good though :)


Woah, I wish I had those supplies!


SSCoasters Administrator
Read The Forum Rules(smart)

Posted Image
Posted ImagePosted Image


#15 stoogie

stoogie

    Newbie

  • Pip
  • 5 posts

Posted 11 January 2012 - 10:29 PM

Awesome job!


#16 Jogumpie

Jogumpie

    Living through the great Gump hiatus...

  • 13586 posts

Posted 18 March 2012 - 07:39 PM

Do you remember this picture from above?

Posted Image
Well, extra cables finally came in from China and so I was able to wire every motor, servo and sensor. Let me show you pictures and explain afterwards.

Posted Image
It is getting crowded in there, isn't it?

Posted Image
I have 16 motors (32 pins), 5 servos (5 pins) and 20 sensors (20 pins; I am not using a shift-in register for this project) hooked up inside the suitcase. An awful lot of breadboard wires connect the Arduino pins with the pin headers on the circuit board. I stripped plastic headers from one end of 36 servo cables (5 cables for the servos need no stripping) and hooked up a total of 41 servo cables.

Posted Image
All of these servo cables extend to the outside of the suitcase and can be used for connecting K'NEX motors, sensors and servos. I will label each of the cables, of course. These servo cables can easily be extended, by plugging in extra servo cables of 1 meter in length. This is especially needed for sensors, since they are located in several places of the K'NEX coaster (in this case my megalooper). For the K'NEX motors, I plug a DC cable into the motor and its + and - wire into the correct servo cable coming from the suitcase. Polarity is very important, so I made sure all these servo cables are correctly polarized. Servos can be plugged into these servo cables directly and for the sensors I will have to solder some pin headers, as the sensor wires are too thin to plug into these servo cables. Note that not all of these servo cables have to be used. This is merely a maximum that this system can currently handle. If I don't use 16 motors, I just put fewer motors in the program's code.

Edited by Jogumpie, 04 September 2013 - 02:32 PM.


SSCoasters Administrator
The SSCoasters Forum Rules
DD_signature.jpg
YoutubeButton.pngFacebookButton.png


#17 -=TK=-

-=TK=-

    Building maniacs

  • 2753 posts

Posted 19 March 2012 - 02:29 AM

That are lots of wires there ;) And when can we expect some video's of it, so we can all see that it works?? :)

-=Tk=-

Posted Image


#18 TheSUCKCrew

TheSUCKCrew

    Way too old

  • 4095 posts

Posted 19 March 2012 - 06:52 AM

Using breadboard wires to connect to your arduino seems very amateuristic in comparision to the rest of this project.


#19 Jogumpie

Jogumpie

    Living through the great Gump hiatus...

  • 13586 posts

Posted 19 March 2012 - 07:54 AM

Please elaborate your opinion.


SSCoasters Administrator
The SSCoasters Forum Rules
DD_signature.jpg
YoutubeButton.pngFacebookButton.png


#20 Maxlaam

Maxlaam

    Tracing Tyrant's Steps

  • 8116 posts

Posted 19 March 2012 - 12:11 PM

Please elaborate your opinion.


Wouldn't hurt no...

While it wouldn't be my choice either, I don't think it's a big of a deal. I myself bought around 13 meters of 10 wire ribbon cable. Mostly because I can just solder those to a row of pinheaders and pop them in, saves time hooking up but to me it's seems like it is a more sturdy way of connecting wires to your Arduino or any other row of pinheaders. I'm not sure if Jogumpie has the wires mapped out in a clear way, but if he makes a mistake he can just switch 2 wires over. Problem solved.

I'm guilty of not drawing my connections between my (P)CB's if I make a mistake with my ribbon cable I can probably do it all over. If Gump feels like re-doing those wires with a ribbon cable he can just give me a shout and I will give him a couple of meters of my ribbon cable.

Nonetheless, you've all seen my changes on Phase during those 2 (almost 3) years, Phase 1.0 was also hooked together with those wires on the inside. Right now I'm aiming for a more permanent look (or as you might call it 'professional') and I'm at least 75% sure that Jogumpie will continue work on this over the years. Minor changes, be it code or wiring, nothing is perfect on the first try. Knowing Jogumpie, he has an eye for detail so I don't mind him using such wires at first, being it a way of learning how to make a working electronics project from scratch. It's his first time too, you know.


SSCoasters Administrator
Read The Forum Rules(smart)

Posted Image
Posted ImagePosted Image


Also tagged with one or more of these keywords: contest, nolimits, roller coaster simulator