Alright well now for my actual comment...
This in unreal. I just can't believe how much effort you put into this, and it is something that is so valuable. You my friend are a genius. I wonder if we can give you something as a reward for something like this...
-Rct2123:cool:
150 replies to this topic
#22

Jogumpie
-
-

- 13586 posts
Living through the great Gump hiatus...
Posted 15 January 2009 - 02:22 PM
Let's make him an Elite. 

SSCoasters Administrator
The SSCoasters Forum Rules


#23
Jesperdude
-

-

- 911 posts
european idiot
Posted 15 January 2009 - 04:49 PM
^lol
The post processing is still very classified but I can give away that in the last picture, the subject is completely extracted from the background BY HAND.
With that information, I bet you guys give me way more respect.
Again, thanks for the nice comments guys, keep them going!
If so, I might post a **BONUS*** tutorial of a "push" system instead of the "switch". (the black rod that points out of the entire thing).
So be gentle!
My signature is expericing a temporay delay and has therefore seized operation.
#24
CP-ephY
-
-
- 2751 posts
thumb abuser
Posted 15 January 2009 - 04:59 PM
I don't think it's clear how the train hits the trigger (and where) and how the rubber band moves to turn the chain. From what I see it seems like the launch is supposed to go the other way than in your sig video. Can you explain exactly how it is working?
#25
Jesperdude
-
-
- 911 posts
european idiot
Posted 15 January 2009 - 05:21 PM
The train doesn't hit the trigger at all. The chain (above) gets pulled back by hand and the chain (below) gets stuck in the trigger, while the rubber bands get stretched.
You pull the trigger and the chain will be released from the trigger.
The rubber band pulls the chain which pulls the train along the launch run.
So basically: the chain below, will move towards the end of the launch which is connected to the rubber band.
That's it:)
You pull the trigger and the chain will be released from the trigger.
The rubber band pulls the chain which pulls the train along the launch run.
So basically: the chain below, will move towards the end of the launch which is connected to the rubber band.
That's it:)
My signature is expericing a temporay delay and has therefore seized operation.
#26
Jogumpie
-
-
- 13586 posts
Living through the great Gump hiatus...
Posted 15 January 2009 - 05:25 PM
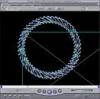
The train doesn't trigger the launch in this tutorial. You see the black rod sticking out to the side? Rotate this rod and the trigger will let go of the chain.
Take a good look at his signature. You can see the actual trigger just 4 blue rods left of the word "JESPER". When the blue rod of the trigger is pulled up, the chain starts spinning clockwise (as seen in the signature), meaning the train will accelerate to the right.
Take a good look at his signature. You can see the actual trigger just 4 blue rods left of the word "JESPER". When the blue rod of the trigger is pulled up, the chain starts spinning clockwise (as seen in the signature), meaning the train will accelerate to the right.
SSCoasters Administrator
The SSCoasters Forum Rules
#27
Shamu
-

-
- 1439 posts
Lead Engineer
Posted 15 January 2009 - 05:27 PM
New SSC Award: Tutorial of the Year.
Seriously, though. This is amazing, Jesper. Front page stuff. Good work and we appreciate the effort.
Seriously, though. This is amazing, Jesper. Front page stuff. Good work and we appreciate the effort.

#28
Loop De Loop
-
- 849 posts
Entry Engineer
Posted 15 January 2009 - 05:30 PM
Send this into knex. See what they have to say....

^^^^Thanks Airdog^^^^
TOP TEN
Top Thrill Dragster
Incredibul Hulk
Mellenium force
Maverick
Mantis
Maginum XL200
Flight Deck
Wicked Twister
Raptor
Beast
#29
Jplaz
-
-
- 2776 posts
Metaphysical Prophet
Posted 15 January 2009 - 05:43 PM
Well since K'nex has their ass up their ass (See- butt seks the ride) , they'll be like, Rawrgh those green numbers are copyrighted!!!111

#30
Jesperdude
-
-
- 911 posts
european idiot
Posted 15 January 2009 - 05:44 PM
Send this into knex. See what they have to say....
They will say that I should buy more K'nex from them.
Thanks Shamu! I like that!

I started to make some nifty add-ons and made some improvements: for example some 3D connectors on top can make contact to the long rod that pulls the trigger from the inside. This will stop the rod from moving and the trigger mechanism will fail. So all you need to do is flip these connectors 90* and your fine.
BTW: How do we like the TTD train using this launch? (signature)
EDIT: ^^The numbers and orbs are made myself
My signature is expericing a temporay delay and has therefore seized operation.
#31
christian
-

-
- 1662 posts
Lead Engineer
Posted 15 January 2009 - 09:42 PM
It looks just like K'nex instruction booklets! Cool! It's like a mini booklet... just a mini booklet.
-MIBB)
-MIBB)
#32
Loop De Loop
-
- 849 posts
Entry Engineer
Posted 16 January 2009 - 06:43 AM
This is so valubal that im taking some of my money, geting them all printed in color on photopaper and turning it into a book and it will be just as nice as the knex books! Anyways your instructions are better then k'nex. Somthing about thim I really love.
^^^^Thanks Airdog^^^^
TOP TEN
Top Thrill Dragster
Incredibul Hulk
Mellenium force
Maverick
Mantis
Maginum XL200
Flight Deck
Wicked Twister
Raptor
Beast
#33
Jesperdude
-
-
- 911 posts
european idiot
Posted 16 January 2009 - 12:53 PM
Great idea LDL, what's next? selling them to get your money back?
No just kidding, it's cool to print, it makes it easier when you are building. (and the white background saves ink!)
Another present for you all (featuring an update for the mechanism, which will be in the tutorial soon):
(My vocals are SO not ready for English)
No just kidding, it's cool to print, it makes it easier when you are building. (and the white background saves ink!)
Another present for you all (featuring an update for the mechanism, which will be in the tutorial soon):
(My vocals are SO not ready for English)
My signature is expericing a temporay delay and has therefore seized operation.
#34
christian
-
-
- 1662 posts
Lead Engineer
Posted 16 January 2009 - 01:24 PM
Woo! Awesome accent you got there. That slo-mo of the rubberbands is cool.
-MIBB)
-MIBB)
#35
RCT2123
-
-

- 5771 posts
Most Rides Cancelled :-)
Posted 16 January 2009 - 02:31 PM
I would rather see a tut of how to make it so when the train hits a rod, it sets off the launch...
-Rct2123:cool:
-Rct2123:cool:
![]()
#36
Jesperdude
-
-
- 911 posts
european idiot
Posted 16 January 2009 - 02:43 PM
I would rather see a tut of how to make it so when the train hits a rod, it sets off the launch...
-Rct2123:cool:
I think that would be difficult, since the trigger has to stay up for a while, not for a second (like in my signature). But it would definitely be great.
My signature is expericing a temporay delay and has therefore seized operation.
#37
spousl16
-

-
- 259 posts
Casual Coaster Enthusiast
Posted 16 January 2009 - 02:53 PM
I just realized that the bottom portion of the launch isn't necessary, except for the rubberband going underneath. If you place the rubberband in the top half, then you wouldn't need to build the bottom half, ultimately saving a lot of pieces.
[SIGPIC][/SIGPIC]
Sean Pousley - Villanova University - Civil Engineering
GO NOVA!
#38
coastergeekrtc
-
-
- 2653 posts
A God Among Users
Posted 16 January 2009 - 03:21 PM
True, but I think the structure adds support. I still think this is a greatest launch. It;s such an innovative mechanism, great work!
*Insert signature here*
#39
Jesperdude
-
-
- 911 posts
european idiot
Posted 16 January 2009 - 04:04 PM
I just realized that the bottom portion of the launch isn't necessary, except for the rubberband going underneath. If you place the rubberband in the top half, then you wouldn't need to build the bottom half, ultimately saving a lot of pieces.
Actually, you're right. A big part of the bottom of the structure isn't really necessary, and it needs a lot of pieces.
But when you make the chain rail, you'll notice that the half-moon connectors are just a little bit over the rod they're attached to. So it kinda needs a bottom part, even when it's just a little bit.
I made the bottom part with blue rods as well because I think it looks better.
Also, I know it takes a very large amount of pieces to make it just like I did. I'm sure you can save some pieces by adding maybe green/red rods. Like I said above, I made it like this because I just love to style.
Tomorrow I'll start shooting the addition part for the tutorial. The "push" part instead of the "twist" part. I think the push mechanism makes this so much more comfortable and nicer.
Of course this will be on a white background as well. (I hope I will be doing it right in once, since I forgot some elements in the tutorial that were digitally added while processing, and I don't have to edit as much as I did before because it was a pain in the ...!).
My signature is expericing a temporay delay and has therefore seized operation.
#40
da master826
-
-
- 1306 posts
Friend of GLaDOS
Posted 16 January 2009 - 06:47 PM
Could you put this in a printable PDF. It looks awesome enough for me to print and bind it.
[SIGPIC][/SIGPIC]![]()
Intimidator305, El Toro, Maverick, Harry Potter and the Forbidden Journey, Top Thrill Dragster