General Electronics Forum - Questions etc.
#41
Posted 11 January 2011 - 01:06 AM
anyway, here's why I'm here.
Login | Facebook
I have to get another transistor for the red sides still but hey this gives you an idea.
That should be a link to a video, but idk if it will work.
#42
Posted 11 January 2011 - 04:39 AM
#43
Posted 11 January 2011 - 05:46 AM
I typically use the prototyping board to test my circuits. Once I know they work then I transfer them over to one board and cut out all the waste.
#44
Posted 17 February 2011 - 05:12 PM
Planning on making a strip of leds about 10 cm long. The strip contains 12 leds in a row in 2 layers (24 in total). It uses 4 channels. The whole idea is to make multiple strips with different colours which can be snapped together. I will test it out with 2 or 3 strips first before making more as I am worried the strips further away from the power-supply will be less bright. (Each strip is about 80 mA, so I can hook up about 12 of them to a 1A power-supply.) Depending on how significant the brightness I will choose to continue or drop this project. I might also switch to 6 channels.
The patterns will be repeating.
SSCoasters Administrator
Read The Forum Rules(smart)
#45
Posted 19 February 2011 - 12:06 PM
Here are some pictures:
The UNO comes in a neat box and also comes with a set of stickers. This is also the first board to be supplied with a warranty notice. 1 year warranty. So if you are afraid you will destroy your board the first time you use it, fear no more!
This is the relay board I made that plugs directly into the UNO. It allows me to control 4 independent relays. (Motors or lights perhaps?)
Total costs: 70 euro's
SSCoasters Administrator
Read The Forum Rules(smart)
#46
Posted 22 February 2011 - 06:12 PM
Decided to work on what I had in mind right away.
This LED bar as of now has a 4 channel running light program powered by Arduino and a custom relayboard.
The back:
Yes that is a CUMload of hot glue there
This allows me to connect multiple boards together so I can choose what order the colours are in or how long I want it to be (of course there is a limit somewhere.
Video:
The orange (Very bright) LED's are just a test. They seemed to be too bright compared to the rest so I won't make any more of those.
SSCoasters Administrator
Read The Forum Rules(smart)
#47
Posted 22 February 2011 - 06:18 PM
#48
Posted 22 February 2011 - 06:47 PM
SSCoasters Administrator
Read The Forum Rules(smart)
#49
Posted 22 February 2011 - 09:26 PM
I'm doing this in electronics class right now.
(Sig under construction)
-----XBL Gamertag - I were Speshul-----
Top 5: Time Machine, The Incredible Hulk, Goliath, Dueling Dragons, Georgia Scorcher
#50
Posted 22 February 2011 - 09:42 PM
I305, El Toro, Goliath (SFoG), Time Machine, Talon, Apollo, Griffon, Georgia Scorcher, Nitro, Manta
Coaster Count: 77
#51
Posted 22 February 2011 - 09:53 PM
Member of a few physics experiments; Orchestrator and/or Copyist for a few musicals.
#52
Posted 23 February 2011 - 10:29 AM
SSCoasters Administrator
Read The Forum Rules(smart)
#53
Posted 24 February 2011 - 02:57 PM
So my father came to me: "Hey Bart, would it be possible to make an automatic station for the model-trains with the arduino?
He told me that there are systems for that available on the internet, but those cost €25 for every rail your station has, and since we have a 9-rail station it would be pretty expansive.
So yeah, I wrote a program for it:
// this are the sensors that check if there is a train on the track
const int Si1 = 1;
const int Si2 = 2;
const int Si3 = 3;
const int Si4 = 4;
// this are the outputs that make the switches switch the way you want them to
const int So1 = 5;
const int So2 = 6;
const int So3 = 7;
const int So4 = 8;
// this are the lights that allow you to check if there is a train on the track
const int Lo1 = 13;
const int Lo2 = 12;
const int Lo3 = 24;
const int Lo4 = 25;
// this are the values that program if the input is high or low
int val1 = 0;
int val2 = 0;
int val3 = 0;
int val4 = 0;
// this are the settings that are used for the blinking led that shows what track is open
int ledState = LOW;
long previousMillis = 0;
long interval = 1000;
void setup(){
// here you program if the pin is an input or output
pinMode(Si1, INPUT);
pinMode(Si2, INPUT);
pinMode(Si3, INPUT);
pinMode(Si4, INPUT);
pinMode(So1, OUTPUT);
pinMode(So2, OUTPUT);
pinMode(So3, OUTPUT);
pinMode(So4, OUTPUT);
}
void loop(){
// here you program the the value's are equal to the sensors that check if there is a train on the track
val1 = digitalRead(Si1);
val2 = digitalRead(Si2);
val3 = digitalRead(Si3);
val4 = digitalRead(Si4);
// this is a code for the blinkingleds
unsigned long currentMillis = millis();
// here you make an if/else statement, if there is a train on the track, it will turn the control-light from that track on and then it will ask the same thing to the next track.
if(val1 == HIGH){
digitalWrite(So1, LOW);
digitalWrite(Lo1, HIGH);
if(val2 == HIGH){
digitalWrite(So2, LOW);
if(val3 == HIGH){
digitalWrite(So3, LOW);
if(val4 == HIGH){
digitalWrite(So4, LOW);
}
// if there is no train on the track, the outputpin gets activated so the switches will turn the good way, and it also turns the other output-pins that might still be activated off.
else{
digitalWrite(So4, HIGH);
// the controllight also gets turned on for a blinking-effect
digitalWrite(Lo4, HIGH);
}
}
else{
digitalWrite(So3, HIGH);
digitalWrite(So4, LOW);
digitalWrite(Lo3, HIGH);
}
}
else{
digitalWrite(So2, HIGH);
digitalWrite(So3, LOW);
digitalWrite(So4, LOW);
digitalWrite(Lo2, HIGH);
}
}
else{
digitalWrite(So1, HIGH);
digitalWrite(So2, LOW);
digitalWrite(So3, LOW);
digitalWrite(So4, LOW);
digitalWrite(Lo1, HIGH);
}
// the system waits for 0,5 sec now, this is to provide the led from the track where the switches are pointing at to stay on for a while
delay(500);
// here it turns the control-lights on/off if there is a/no train on the track.
if(val1 == HIGH){
}
else{
digitalWrite(Lo1, LOW);
}
if(val2 == HIGH){
digitalWrite(Lo2, HIGH);
}
else{
digitalWrite(Lo2, LOW);
}
if(val3 == HIGH){
digitalWrite(Lo3, HIGH);
}
else{
digitalWrite(Lo3, LOW);
}
if(val4 == HIGH){
digitalWrite(Lo4, HIGH);
}
else{
digitalWrite(Lo4, LOW);
}
// the system waits for 0,5 sec now, this is to provide the led from the track where the switches are pointing at to stay off for a while
delay(400);
}
#54
Posted 24 February 2011 - 03:30 PM
#55
Posted 24 February 2011 - 09:30 PM
is that something you learn at school, because i am only 12 and that looks freakin complicated. (it looks cool i wanna learn it lol)
I wished they would teach me this at school...
Nope, maxlaam and floris2burn helped me a little, but you also have to just follow examples and try untill you get it to work.
As soon as you understand the basics, it's easy as pie:)
**
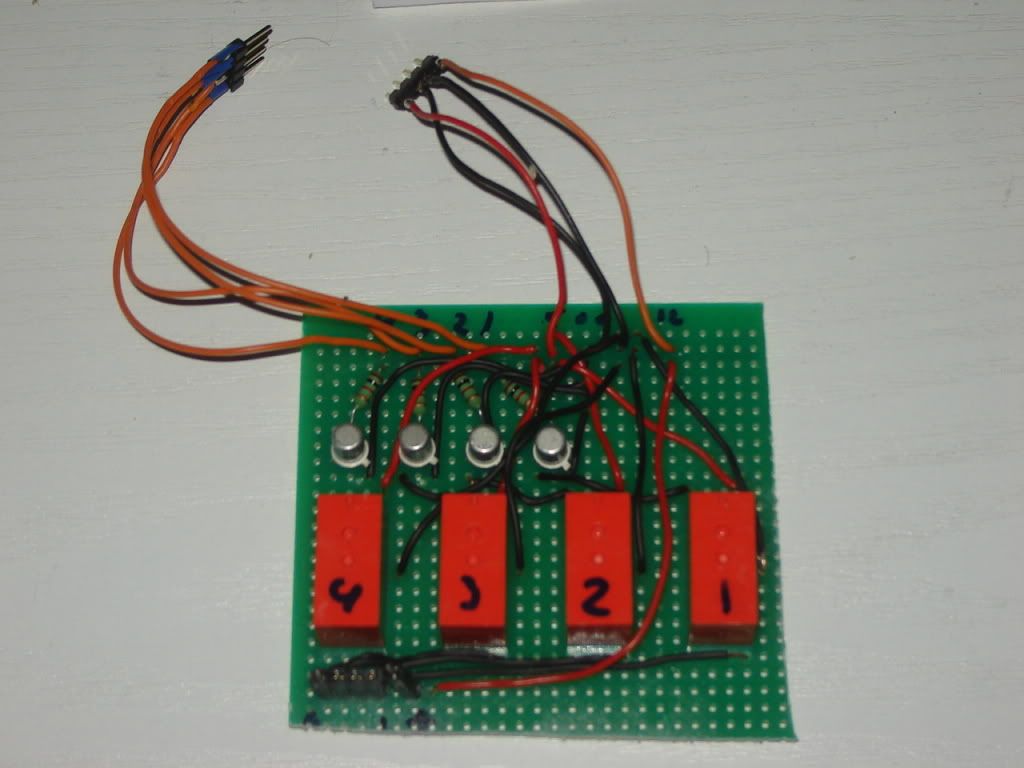
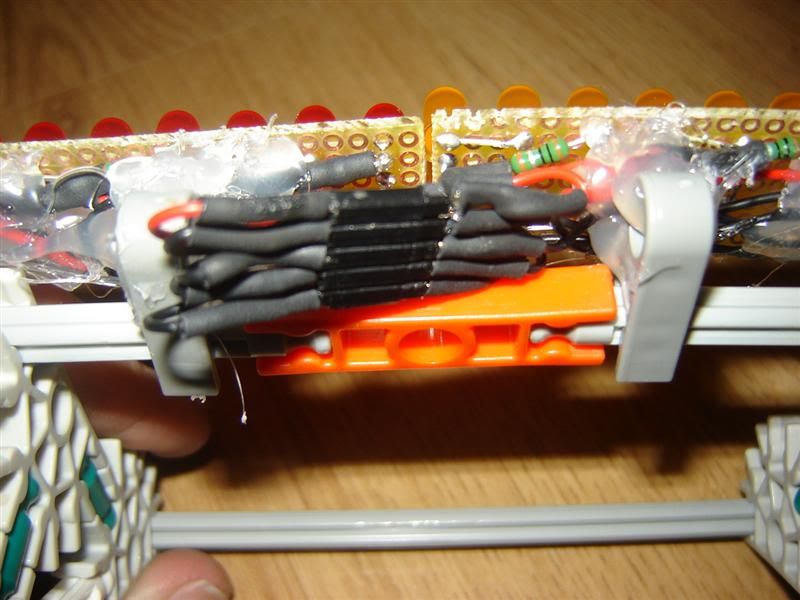
Okay guys, I've been working on a way to see if there is a train on the track, and my final solution is this:
I'll place an LDR (Light Dependent Resistors) on the end of the track, with one leg connected to Ground, and the other leg connected to pin1-4 and via a resistor (with a higher resistance than the LDR while illuminated) to 5V.
If there is no train on the track, the resistor gets illuminated, so it will let through the electricity from pin1-4 to ground, and since electricity want to choose the way with the less resistance, it doesn't choose to go from pin 1-4 via a resistor to 5V.
But if there is a train on the track, the LDR will be in the shadow so it will have more resistance than the resistor.
And again, electricity wants to choose the way with the less resistance, so it chooses to go from the 1-4pin to the 5V.
Basicly, it senses if the LDR is in the shadow of a train or not.
#56
Posted 24 February 2011 - 09:36 PM
.
#57
Posted 08 March 2011 - 06:29 PM
Blinking Led-Sign not using delays but millis?
AWESOME!!!
Let me add on to this that I did not get any advice from Max or Floris to program this.
#58
Posted 09 March 2011 - 03:43 AM
Then let's start programming that!
And how's the station program going? I may not have helped with the blinking leds, but after spending hours on the station stuff, I want to see result
#59
Posted 09 March 2011 - 07:10 AM
Now solder 2 more dimensions on it and you got a 3D cube.
Then let's start programming that!
And how's the station program going? I may not have helped with the blinking leds, but after spending hours on the station stuff, I want to see result
Already ordered most of the electronic stuff, I will make a test-setup soon.
With the "no help from floris", I kinda forgot to say that floris has been tutoring me a lot about arduino in general, he learned me all the basics, so thanks for that floris;)
#60
Posted 09 March 2011 - 08:20 AM
Already ordered most of the electronic stuff, I will make a test-setup soon.
With the "no help from floris", I kinda forgot to say that floris has been tutoring me a lot about arduino in general, he learned me all the basics, so thanks for that floris;)
I wouldn't say just the basics as you already surpassed my coding skills
SSCoasters Administrator
Read The Forum Rules(smart)