Awesome, will most definitely order that with mine, please hold on till the end of this week when I calculate the A's my leds will draw.
Suck's Electronics
Started by
TheSUCKCrew
, Nov 25 2011 05:52 PM
knex rippin rocket roller coaster screamin serpent
36 replies to this topic
#21

Maxlaam
-

-

- 8116 posts
Tracing Tyrant's Steps
#22
TheSUCKCrew
-

-

- 4095 posts
Way too old
Posted 07 March 2012 - 01:55 AM
I got some more work done on the code. It will probably get even bigger, but this is what I have right now:
;******CONSTANTS******

STATUS equ 03h
TRISA equ 85h
TRISB equ 86h
PORTA equ 05h
PORTB equ 06h
COUNT1 equ 20h
COUNT2 equ 21h
CMCON equ 1Fh
REPEATS equ    22h
W    equ    00h
STATO    equ    23h

;******PORTS*******
    bsf        STATUS,5  ;Go to Bank 1
    MOVLW    B'00000000' ;Set all PORTB to outputs
    MOVWF    TRISB
    MOVLW    B'00000000' ;Set all PORTA to outputs
    MOVWF    TRISA
    MOVLW    B'11010111' ;Load options for the PIC
    MOVWF    81h
    bcf        STATUS,5 ;Go back to Bank 0

;***PIC settings**
        MOVLW    B'00000111' ;Turn the Comparator module off
        MOVWF    CMCON
_BODEN_ON                    EQU     H'3FFF' ;Some other settings
_BODEN_OFF                   EQU     H'3FBF'
_CP_ALL                      EQU     H'03FF'
_CP_75                       EQU     H'17FF'
_CP_50                       EQU     H'2BFF'
_CP_OFF                      EQU     H'3FFF'
_DATA_CP_ON                  EQU     H'3EFF'
_DATA_CP_OFF                 EQU     H'3FFF'
_PWRTE_OFF                   EQU     H'3FFF'
_PWRTE_ON                    EQU     H'3FF7'
_WDT_ON                      EQU     H'3FFF'
_WDT_OFF                     EQU     H'3FFB'
_LVP_ON                      EQU     H'3FFF'
_LVP_OFF                     EQU     H'3F7F'
_MCLRE_ON                    EQU     H'3FFF'
_MCLRE_OFF                   EQU     H'3FDF'
_ER_OSC_CLKOUT               EQU     H'3FFF'
_ER_OSC_NOCLKOUT             EQU     H'3FFE'
_INTRC_OSC_CLKOUT            EQU     H'3FFD'
_INTRC_OSC_NOCLKOUT          EQU     H'3FFC'
_EXTCLK_OSC                  EQU     H'3FEF'
_LP_OSC                      EQU     H'3FEC'
_XT_OSC                      EQU     H'3FED'
_HS_OSC                      EQU     H'3FEE'
 __CONFIG        _BODEN_ON & _CP_OFF & _DATA_CP_OFF & _PWRTE_ON & _WDT_OFF & _LVP_OFF & _MCLRE_ON & _XT_OSC

                GOTO SETUP

;***Mainloop*****
PROGRAM        MOVLW    D'3'
            MOVWF    REPEATS
STEP1        CALL    UPDOWN
            DECFSZ    REPEATS,1
            GOTO    STEP1
            MOVLW    D'6'
            MOVWF    REPEATS
            CLRF    PORTA
            CLRF    PORTB
STEP2        CALL    INVERT
            CALL    DELAY_LONG
            CALL    DELAY_LONG
            DECFSZ    REPEATS,1
            GOTO    STEP2
            MOVLW    B'01010101'
            MOVWF    PORTB
            MOVLW    B'00000101'
            MOVWF    PORTA
            MOVLW    D'6'
            MOVWF    REPEATS
STEP3        CALL    INVERT
            CALL     DELAY_LONG
            CALL    DELAY_SHORT
            DECFSZ    REPEATS,1
            GOTO    STEP3
            BTFSC    STATO,0
            GOTO    STEP4
            CALL    UPDOWN
            BSF        STATO,0
            MOVLW    D'6'
            MOVWF    REPEATS
            CLRF    PORTA
            CLRF    PORTB
            GOTO    STEP2
STEP4        MOVLW    D'8'
            MOVWF    REPEATS
            MOVLW    B'00001111'
            MOVWF    PORTA
            MOVLW    B'00000011'
            MOVWF    PORTB
STEP5        CALL    DELAY_LONG
            CALL    DELAY_SHORT
            CALL    INVERT
            DECFSZ    REPEATS,1
            GOTO    STEP5

            GOTO    PROGRAM

;***Knightrider***
UPDOWN        CLRF    PORTA
            CLRF    PORTB
            CALL    INVERT
            BCF        PORTA,0
            CALL    DELAY_SHORT
UPA            RLF        PORTA,1
            BSF        PORTA,0
            CALL    DELAY_SHORT
            BTFSC    PORTA,3
            GOTO    UPA
            BSF        PORTA,3
            BCF        PORTB,0
            CALL    DELAY_SHORT
UPB            RLF        PORTB,1
            BSF        PORTB,0
            CALL    DELAY_SHORT
            BTFSC    PORTB,7
            GOTO    UPB
DOWNB        RRF        PORTB,1
            BSF        PORTB,7
            CALL    DELAY_SHORT
            BTFSC    PORTB,0
            GOTO    DOWNB
            BSF        PORTB,0
            BCF        PORTA,3
            CALL    DELAY_SHORT
DOWNA        RRF        PORTA,1
            BSF        PORTA,3
            CALL    DELAY_SHORT
            BTFSC    PORTA,0
            GOTO    DOWNA
        return

;***Delayloop****

DELAY_SHORT        MOVLW   D'150'
                MOVWF   COUNT2
DEL_LOOP1       MOVLW   D'255'
                MOVWF   COUNT1
DEL_LOOP2        DECFSZ  COUNT1,1
                GOTO    DEL_LOOP2
                DECFSZ  COUNT2,1
                GOTO    DEL_LOOP1
    return

DELAY_LONG        MOVLW    D'255'
                MOVWF    COUNT2
DEL_LOOP3        MOVLW    D'255'
                MOVWF    COUNT1
DEL_LOOP4        DECFSZ    COUNT1,1
                GOTO    DEL_LOOP4
                DECFSZ    COUNT2,1
                GOTO    DEL_LOOP3
    return

;****Invertall****
INVERT            COMF    PORTA,1
                COMF    PORTB,1
            return

;****Setup****
SETUP    CLRF    TRISA
        CLRF    TRISB
        CLRF    STATO
        GOTO    PROGRAM

    GOTO PROGRAM
    END
#23
Maxlaam
-
-
- 8116 posts
Tracing Tyrant's Steps
Posted 07 March 2012 - 06:54 PM
Any progress on the potmeter input so far? 
SSCoasters Administrator
Read The Forum Rules(smart)


#24
TheSUCKCrew
-
-
- 4095 posts
Way too old
Posted 10 March 2012 - 04:37 AM
^ Not yet. There is little information about how the comparator module works, so I'll have to work on that some more.
Some other project I've been working on:
My dad wanted me to make something that would make a train shuttle between 2 stations (and wait for 10seconds at the station in the middle). You can buy stuff for that, but those things cost >40$, so it seemed like a smart idea to make it myself. How much the costs are for MY board? 4$.
Picture of the 3D model:
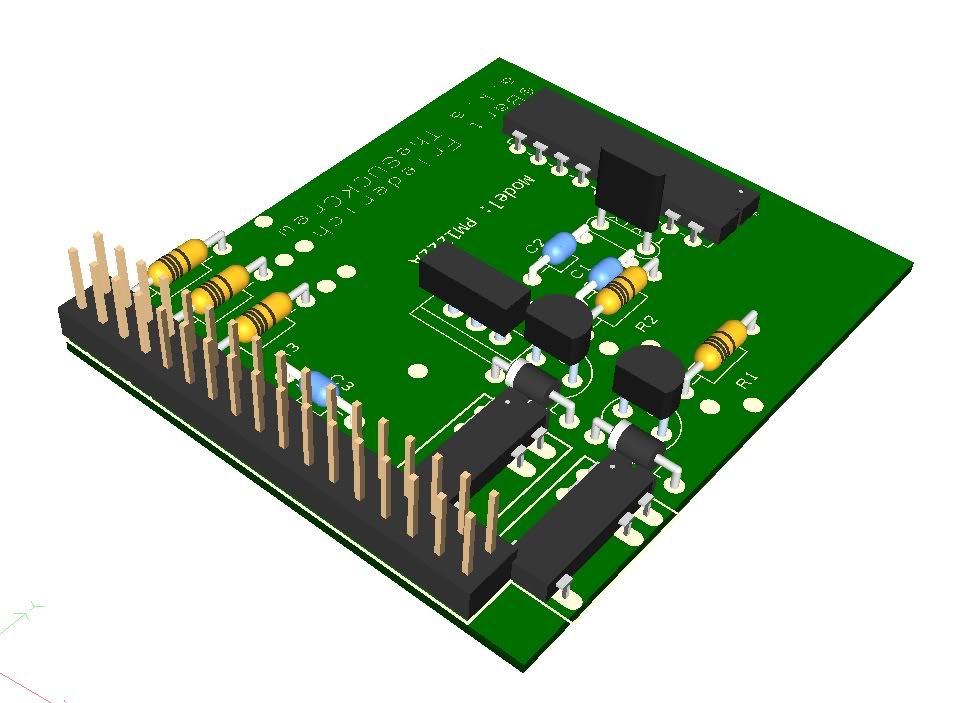
I will solder it today, and when I get my sensors I will attach it and make a video.
-Suck.
Some other project I've been working on:
My dad wanted me to make something that would make a train shuttle between 2 stations (and wait for 10seconds at the station in the middle). You can buy stuff for that, but those things cost >40$, so it seemed like a smart idea to make it myself. How much the costs are for MY board? 4$.
Picture of the 3D model:
I will solder it today, and when I get my sensors I will attach it and make a video.
-Suck.
#25
-=TK=-
-

-

- 2753 posts
Building maniacs
Posted 10 March 2012 - 05:14 AM
Smart... Really smart You have some more work on that, but if you like it and you can save 36$ with making it yourself, why not??
-=Tk=-
You have some more work on that, but if you like it and you can save 36$ with making it yourself, why not??-=Tk=-

#26
TheSUCKCrew
-
-
- 4095 posts
Way too old
Posted 23 March 2012 - 09:24 AM
My current project is making my own USB device. This way I would be able to for instance control my rides with my laptop. It is pretty complicated. There are USB-chips avaible. This chip contains all the USB protocols and makes it less impossible to make a USB device.
But you can also just do it the hard way and learn the USB protocols yourself. I've downloaded an eBook on this, and it's 400 pages of impossibru-ness. I will have to find out whether this is possible or not...
But you can also just do it the hard way and learn the USB protocols yourself. I've downloaded an eBook on this, and it's 400 pages of impossibru-ness. I will have to find out whether this is possible or not...
#27
TheSUCKCrew
-
-
- 4095 posts
Way too old
Posted 28 April 2012 - 06:55 PM
I made my own PWN for my PICs. So my lightsign-drivers will allow fading etc. soon.
This is what I got so far:
By the way, like any ledsign, it looks a lot better in real life. Cameras tend to over-correct the brightness, which makes fades look really ugly. Well, whatever, enjoy!
This is what I got so far:
By the way, like any ledsign, it looks a lot better in real life. Cameras tend to over-correct the brightness, which makes fades look really ugly. Well, whatever, enjoy!
#28
TheSUCKCrew
-
-
- 4095 posts
Way too old
Posted 08 May 2012 - 10:03 AM
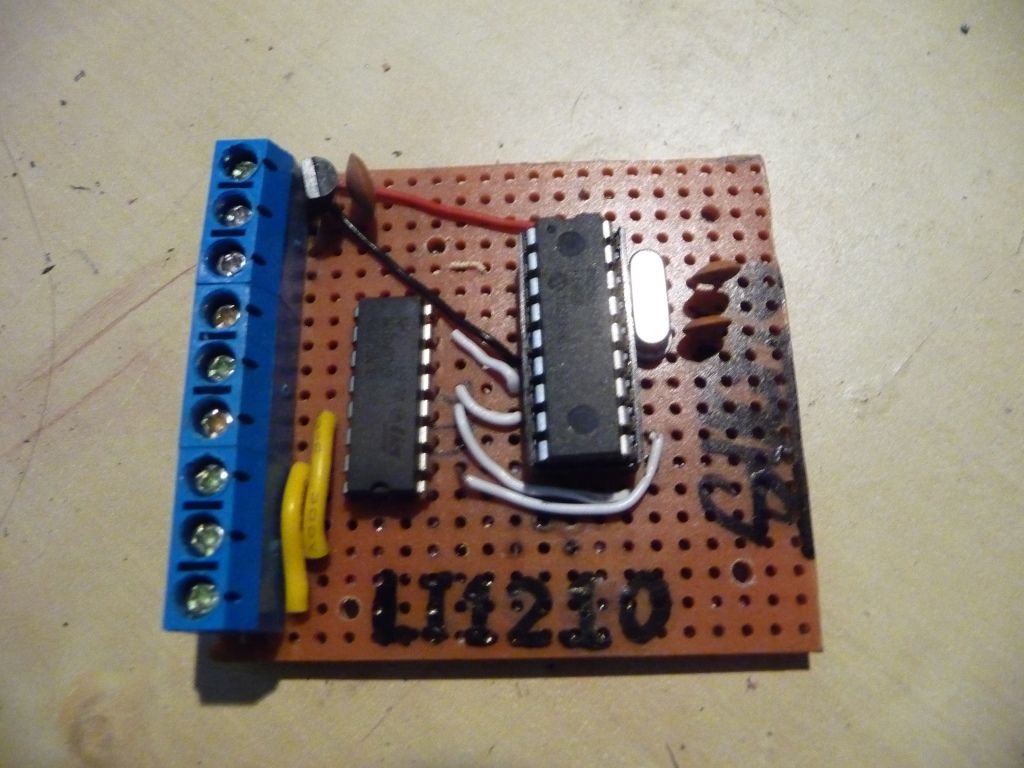
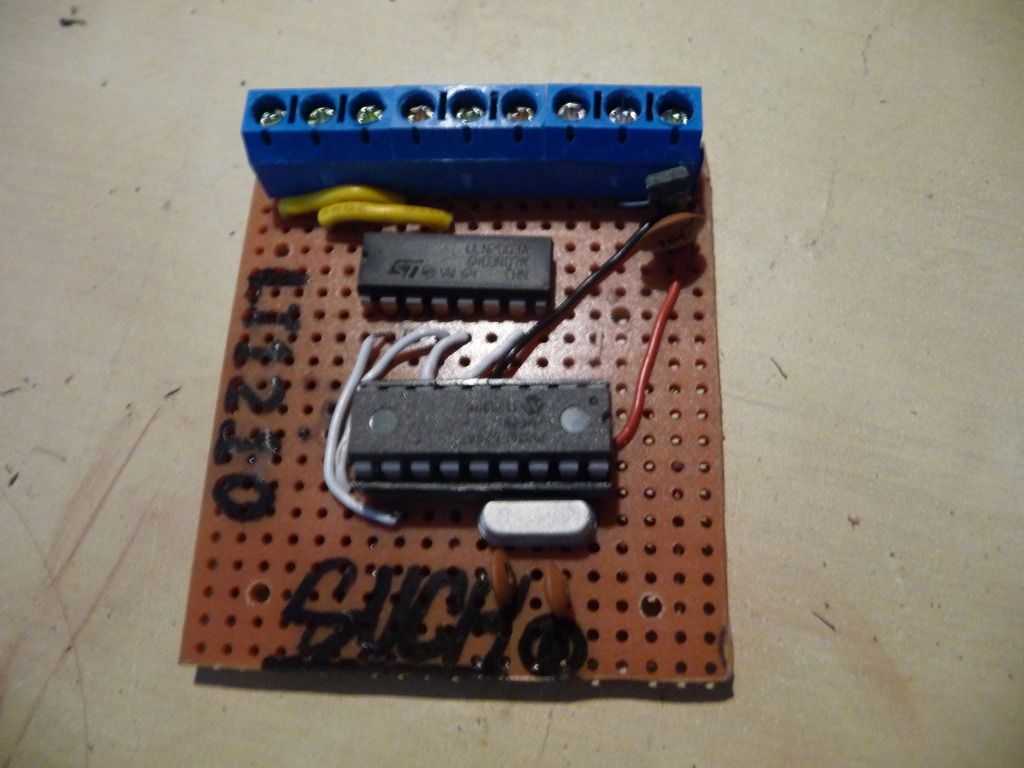
Hey people! The driver for Lambchopz is done, and I'm rather happy with the result. The board looks a lot cleaner than the last one. Pictures:
And a comparision with the last one (this one only has 6 channels, so that's why it's a bit smaller):
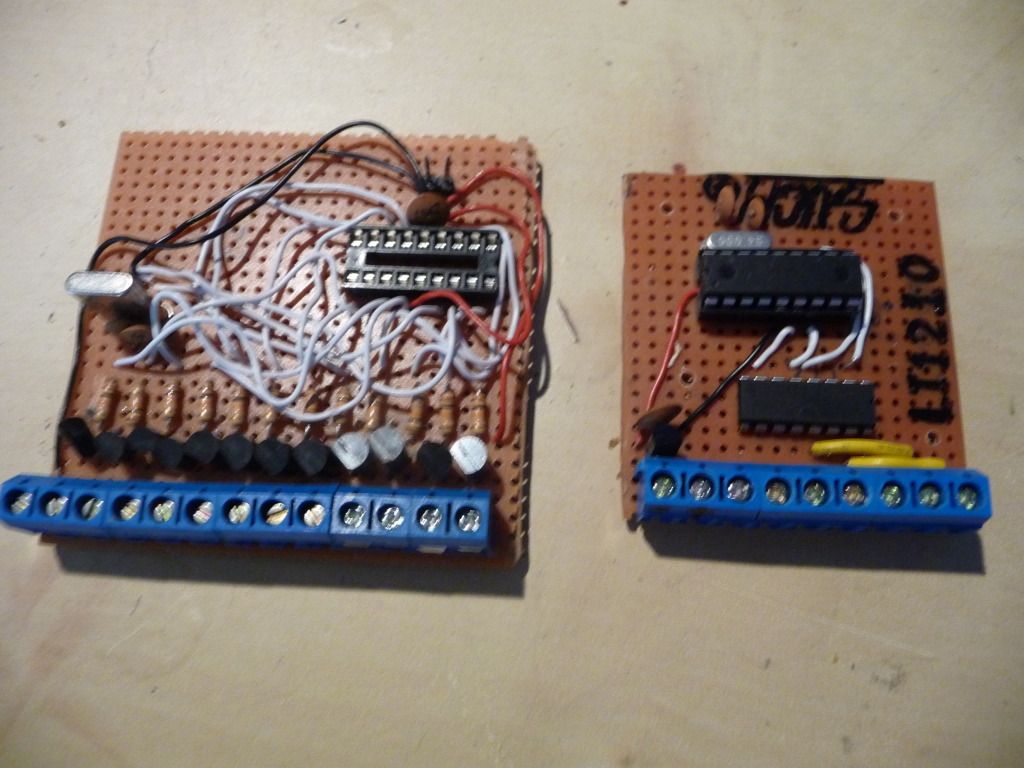
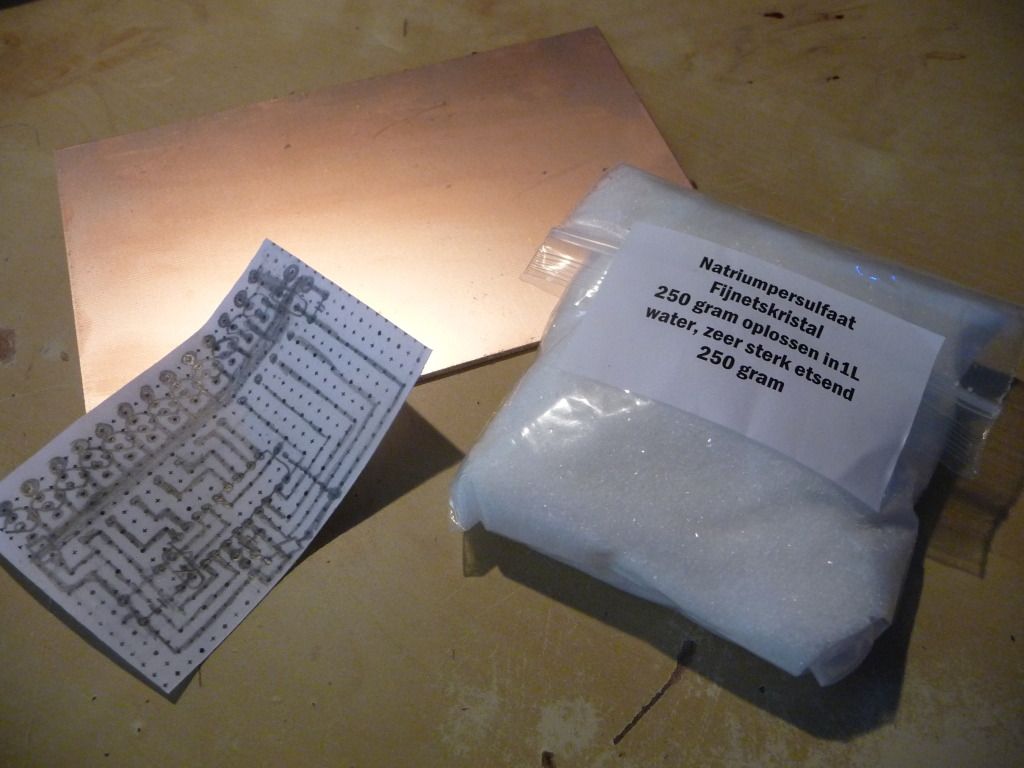
But there has been even more progress. I have finally received my PCB etching materials. This means I will be able to etch my own circuit boards, and thus avoiding a LOT of soldering and wires.
My first project will be the lightsign driver. This is the PCB that I have planned for it:
Edit: Gump just told me something about PCB drawing: You should avoid 90* angles as much as you can. (Jeez, what does this guy NOT know???) So I redid it. This is the result:
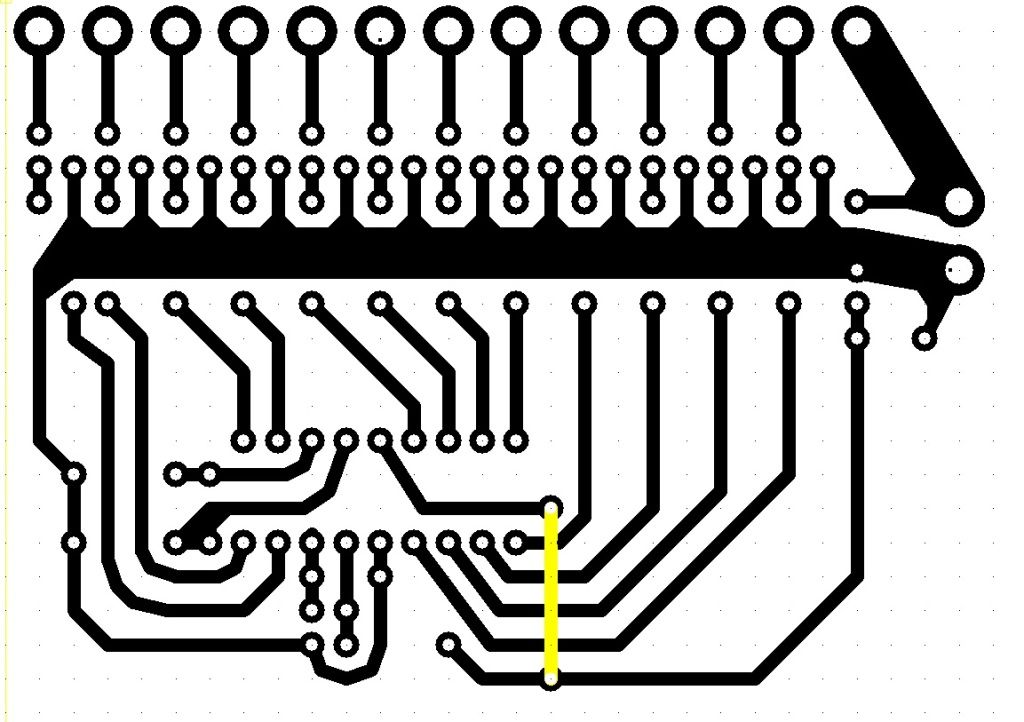
It is pretty darn small, and the only wire that I will need to solder is the little yellow thingy. I will give you an update as soon as I have the first one up and running.
And a comparision with the last one (this one only has 6 channels, so that's why it's a bit smaller):
But there has been even more progress. I have finally received my PCB etching materials. This means I will be able to etch my own circuit boards, and thus avoiding a LOT of soldering and wires.
My first project will be the lightsign driver. This is the PCB that I have planned for it:
Edit: Gump just told me something about PCB drawing: You should avoid 90* angles as much as you can. (Jeez, what does this guy NOT know???) So I redid it. This is the result:
It is pretty darn small, and the only wire that I will need to solder is the little yellow thingy. I will give you an update as soon as I have the first one up and running.
#29
Maxlaam
-
-
- 8116 posts
Tracing Tyrant's Steps
Posted 08 May 2012 - 10:30 AM
There are so many different ways to etch PCB's...
SSCoasters Administrator
Read The Forum Rules(smart)
#30
Snake
-

- 444 posts
Construction Worker
Posted 08 May 2012 - 05:53 PM
Why don't you move some things so you don't have that ugly wire. I drew a red line where it wold be an easy fix.
Such as:
Such as:
#31
Maxlaam
-
-
- 8116 posts
Tracing Tyrant's Steps
Posted 08 May 2012 - 05:57 PM
That line would be going directly under a PIC, don't think that will fit. You can't have the lines too close together.
SSCoasters Administrator
Read The Forum Rules(smart)
#32
Snake
-
- 444 posts
Construction Worker
Posted 08 May 2012 - 06:14 PM
I didn't notice that it was under the pic. Never mind then.
#33
TheSUCKCrew
-
-
- 4095 posts
Way too old
Posted 18 May 2012 - 06:19 AM
There are so many different ways to etch PCB's...
Yeah, there are. But it's rather applying the "paint" that varies. The actual etching is always practically the same, just with different chemicals.
And you are right Max, that line would be way to small.
I have finished my first PCB! I am satisfied with the result. I have to apply the paint better next time, but other than that, I think it looks great, especially for a first one.
Pictures:
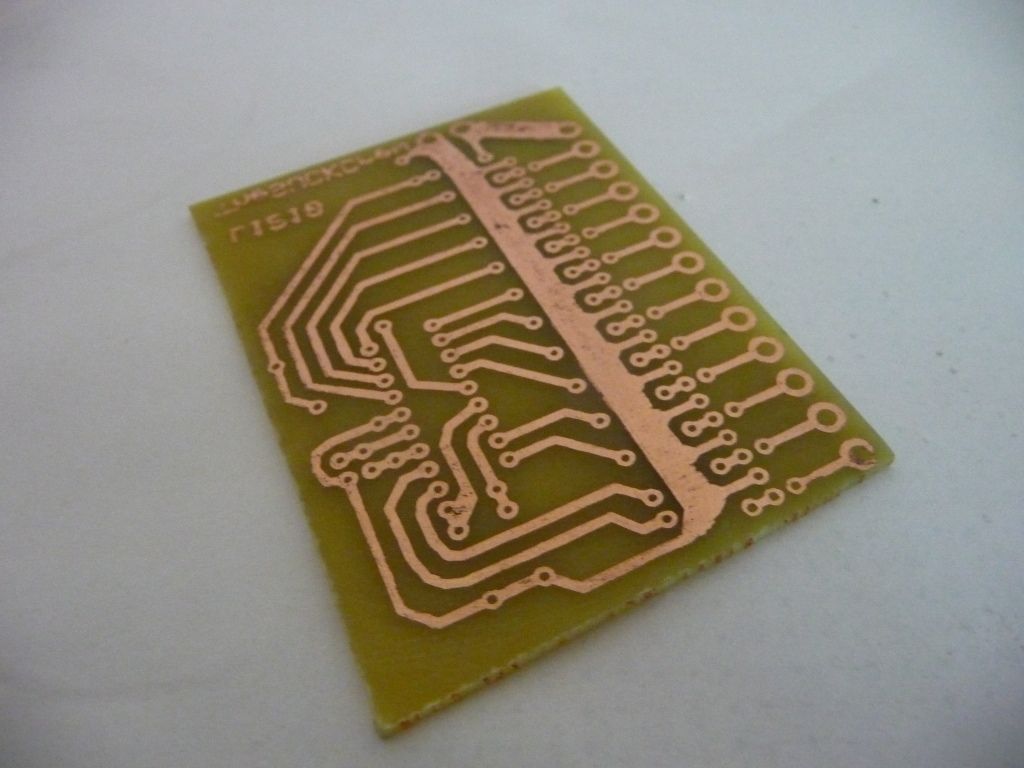
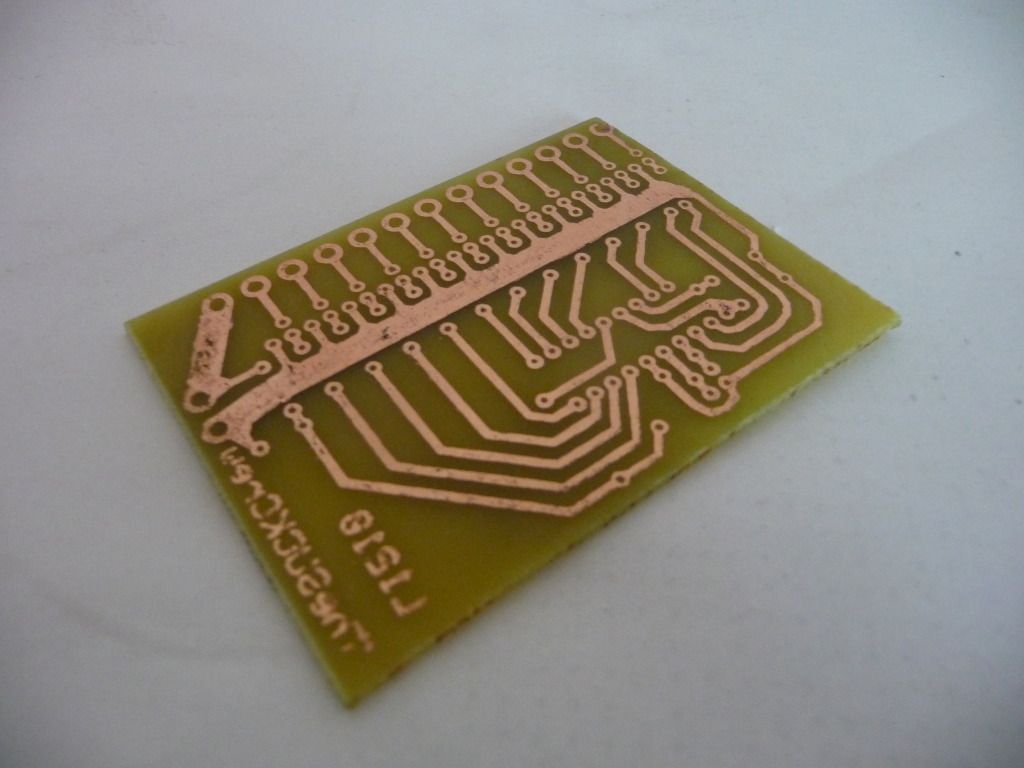
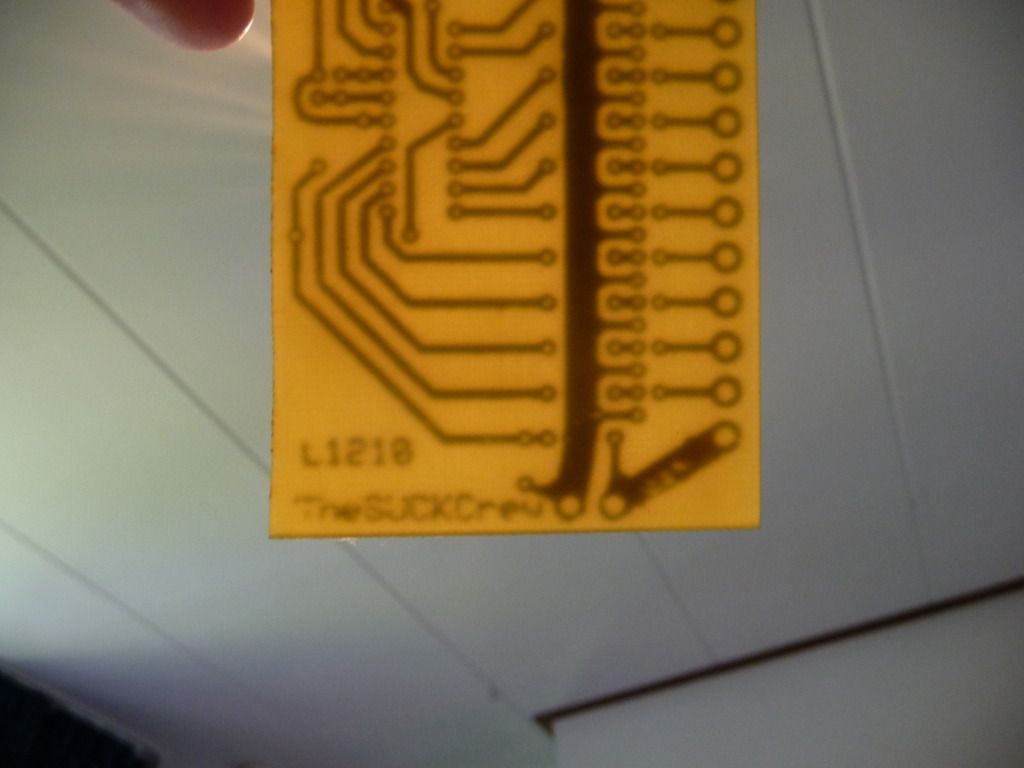
I will try drilling the holes and placing the components today, and then it should be done!
-Suck.
#34
Maxlaam
-
-
- 8116 posts
Tracing Tyrant's Steps
Posted 18 May 2012 - 09:37 AM
That's good for the first time!
As you said, the "paint" needs to be applied with a little more care, right now it has a few flakes in the traces which can be devastating for smaller traces.
If you want to patch up the bad traces you can apply a tiny bit of solder over them.
Edit:
Teehee
As you said, the "paint" needs to be applied with a little more care, right now it has a few flakes in the traces which can be devastating for smaller traces.
If you want to patch up the bad traces you can apply a tiny bit of solder over them.
Edit:
Teehee
SSCoasters Administrator
Read The Forum Rules(smart)
#35
Snake
-
- 444 posts
Construction Worker
Posted 18 May 2012 - 05:37 PM
^Mi no me gustan holandés vídeos.
Nice job for your first try.
Nice job for your first try.
#36
TheSUCKCrew
-
-
- 4095 posts
Way too old
Posted 09 August 2012 - 04:40 PM
A 110Amps MosFet is coming...
Should be enough for my upcoming 82watt project:)
Should be enough for my upcoming 82watt project:)
#37
TheSUCKCrew
-
-
- 4095 posts
Way too old
Posted 09 August 2012 - 04:40 PM
A 110Amps MosFet is coming...
Should be enough for my upcoming 82watt project:)
Should be enough for my upcoming 82watt project:)


