The aim of this tutorial is to enable you to create a custom-designed Eurofighter car. This video demonstrates the car working. YouTube - K'nex - Slate - Custom Cars
What is a Eurofighter car?
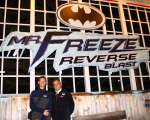
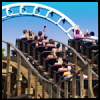
A Eurofighter Car (short for Gerstlauer Eurofighter) is a rollercoaster train designed by Gerstlauer; the cars are made for coasters that always feature a vertical lift hill and a drop that bends in on itself (usually by 7 degrees). The train is simple; it can hold eight riders (arranged in two rows of four).
Why make this?
This car adds a special element of realism that you cannot achieve by using an ordinary micro car. Also, for recreations of real rides the car fits on perfectly. It will also let you to say you used a custom car.
How does it work?
This car operates in the same way as other K'nex cars. It does not share the same flexibility but it can cope with curved track and can still get through slightly sharp drops and airtime hills. The front and back sections do not rotate independently; however if the front is fixed in place the back can roll about 20 degrees each way.
Main Tutorial
Step 1: Gather these parts (Note: You will need four of the Y-shaped connector without a number next to it) To get the frame for a car, take an ordinary micro car and unscrew the four screws on the bottom of the car - you should take out the chaindog but I highly recommend keeping it somewhere safe for when you are finished with the car.
Step 2: Using one screw, one five-way connector and the frame, make this: the screw should come out from the frame by around 6mm. You can experiment with what works best.
Step 3: Now, add the second screw and connector, and join the two as shown.
Step 4: Make two of these, they will enable you to add the seats and front to the car.
Step 5: Add like so.
Step 6:
Now make two of these. They are the seats. WORD OF ADVICE: Take three green rods and position them on one connector first, now connect a connector and slide it next to the first: do so until all eight are on, then slide them into position.
Step 7: On one of the rows add two Y-clips.
Step 8: Join on like so.
Step 9: Add 13 2-way connectors to a green rod and add two Y-clips either side like so.
Step 10: Add on and you're done!
No replies to this topic
#1

Micronex
-
-

- 1270 posts
Another piece for my collection
Posted 06 June 2011 - 05:17 PM
My Eurofighter Car is completed!!!


Also tagged with one or more of these keywords: board, kingdaka876
Theme Parks, Coasters, Games, & More →
Amusement & Theme Parks →
Favorite Park Visited in 2011Started by SuperTKDKid , 10 Oct 2011 |
|
|
||
 |
Theme Parks, Coasters, Games, & More →
Talk About Anything →
Selling K'nexStarted by Guest__* , -- |
|
|
|
K'NEX Discussion & Construction Area →
K'NEX Coaster Construction →
Immerse (Update 10/2/11- Pictures)Started by RollerManiac , 01 Jul 2011 |
|
|
||
K'NEX Discussion & Construction Area →
K'NEX Coaster Construction →
Summer Heat - Dizzy dropper coaster (FINAL)Started by shutny , 24 Jun 2011 |
|

|
||
K'NEX Discussion & Construction Area →
K'NEX Coaster Construction →
vv B&M Looper cars madeStarted by jespercoasters , 25 Apr 2011 |
|
|

