I think Ickus still has the most likely source of the issues. I finally got back to this and picked the 4 motors that looked the most alike and set them up in a similar fashion. The ran for almost 3 hours. I was just about to declare success and then they locked up. hmmmmph
New plan is to give up trying to drive everything with one group of motors. I should maybe 2 will be enough for the main lift I think single motors will be sufficient for the brake run and the station.
I also ordered some 4 channel power sources and am going to get some connectors. I am fairly certain they are DCP-2155 connectors, which are very common and only a few dollars each.
This and other demands of my time has really put this project at a standstill.
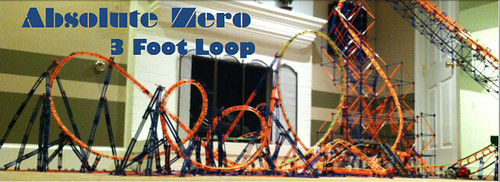
Comet Recreation (Almost complete 4/1/17)
Started by
ForgotToGrowUp
, Jan 29 2012 09:51 PM
198 replies to this topic
#61
: post #61")
ForgotToGrowUp
-
-

- 1732 posts
Lead Engineer
Posted 03 April 2012 - 09:16 PM
Comet Recreation still underway.
Proof you never grow up if you keep playing with toys!
#62
ForgotToGrowUp
-
-
- 1732 posts
Lead Engineer
Posted 21 January 2013 - 06:48 PM
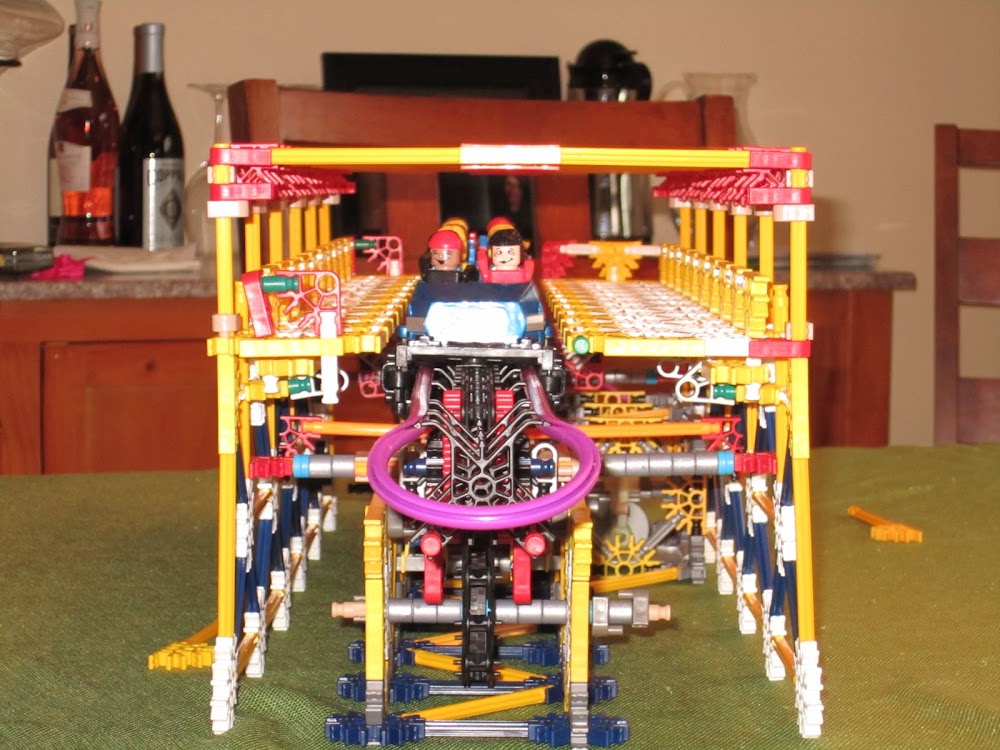
Wow, this thread was on page 15! It's been a LONG time I know. The coaster mostly collected dust for the last 9 months. I did a little here and there and spent some time playing with Arduino and other electronics for control of this coaster (other thread in electronics sub-forum). I started doing some real building again the last few weekends. I need to get the station, lift and brake run working before I can build any more structure or track because it will be impossible to do after the fact. I've had to redo a bunch of the existing structures. Most of the track work will be completely redone once I finish getting the station done. The existing track work is all in horrible shape from all the changes I've made to the structure. Save any comments about track shaping. The big obstacle for this coaster was getting the station to fit in the very dense structure. I've tried a lot of things that did not work but think I finally have a path forward. Here are a few photos to catch up on what's happened in to this since last year.
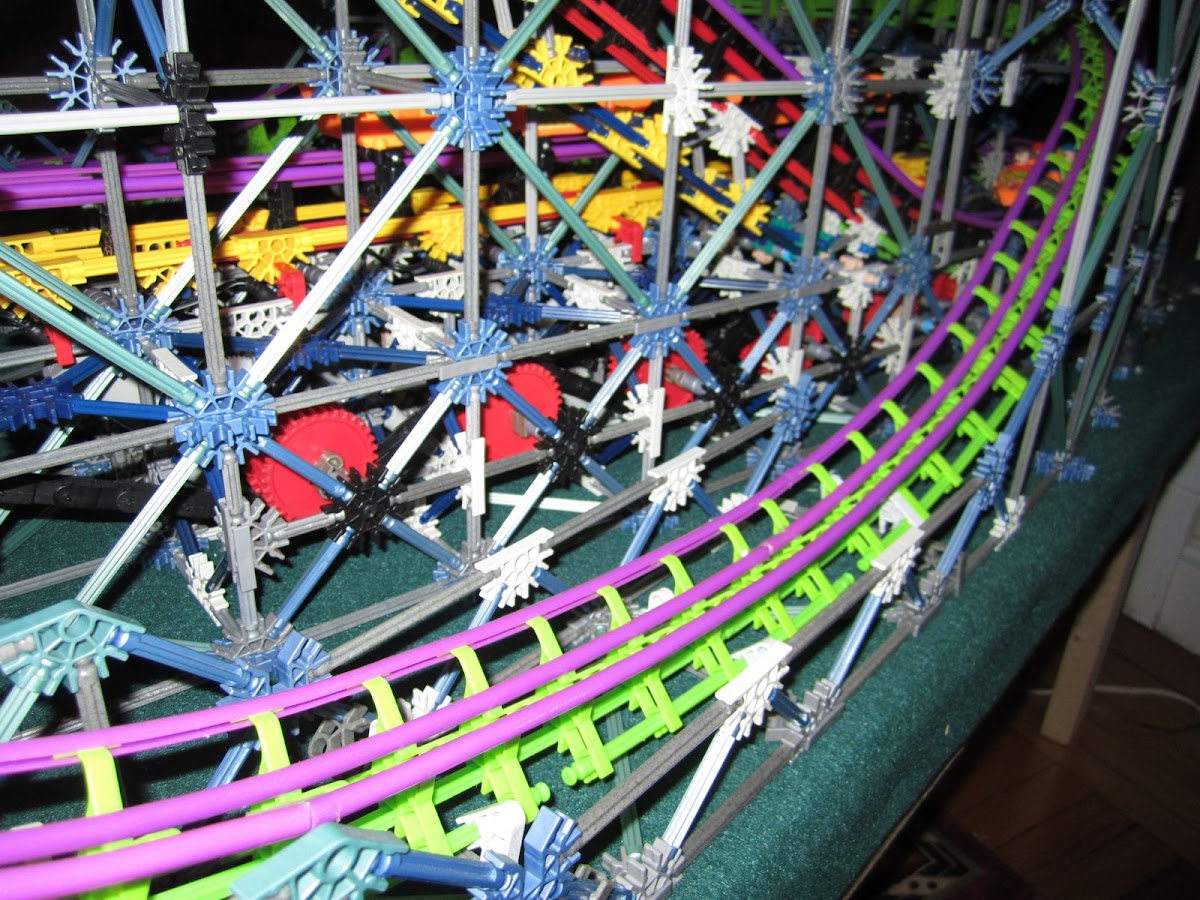
This is the pre-lift turn. One of the biggest adjustments I had to make was to move this off to one side like it is now. I had it in the middle of the bigger turn and that made it impossible to fit the station. I went through some of the old photos I found of the real coaster and realized this is how the real one was too. (My original layout was based on a NoLimits recreation someone had done and posted on the web.) I only had to move it about 4 " to the left but that involved moving the entire lift hill structure, which in turn affected the final run that crosses underneath the lift, the first big hill and brake run, which are all part of a single large structure. That small move, took me a good part of a day and a lot of planning.
This is shows the hole in the structure where the station and entrance/exit ramp will go.

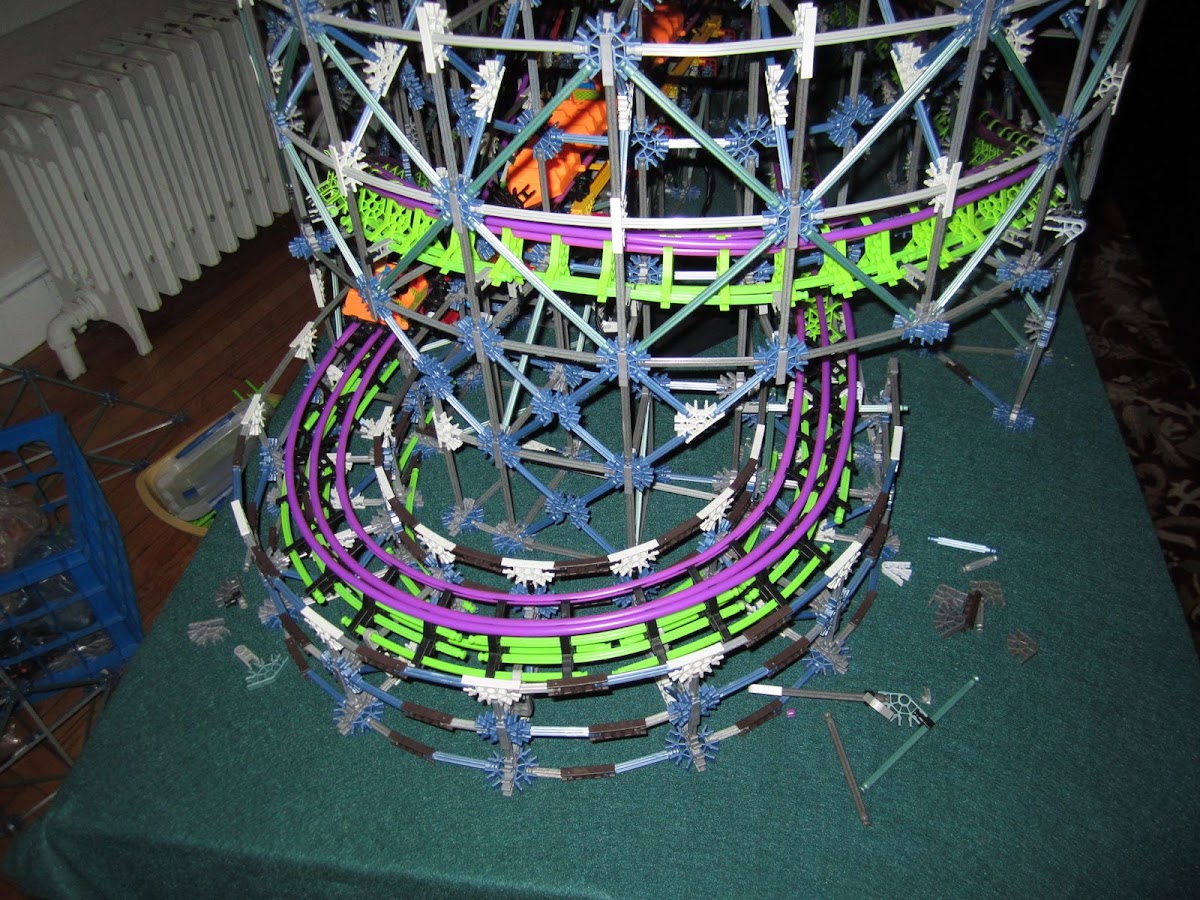
This is the modified (shortened) brake run. (the brake run was one of the last things I built before stopping last year)
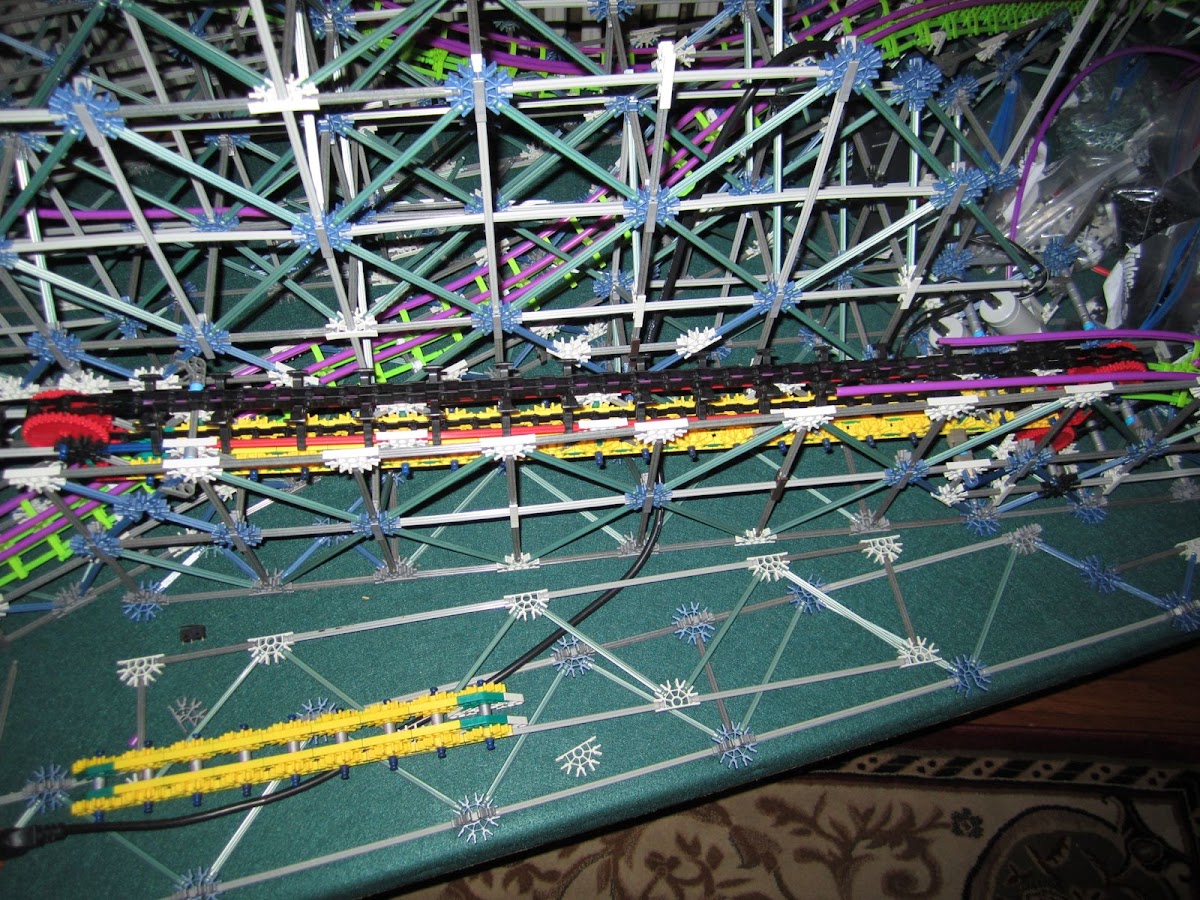
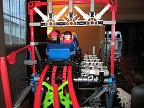
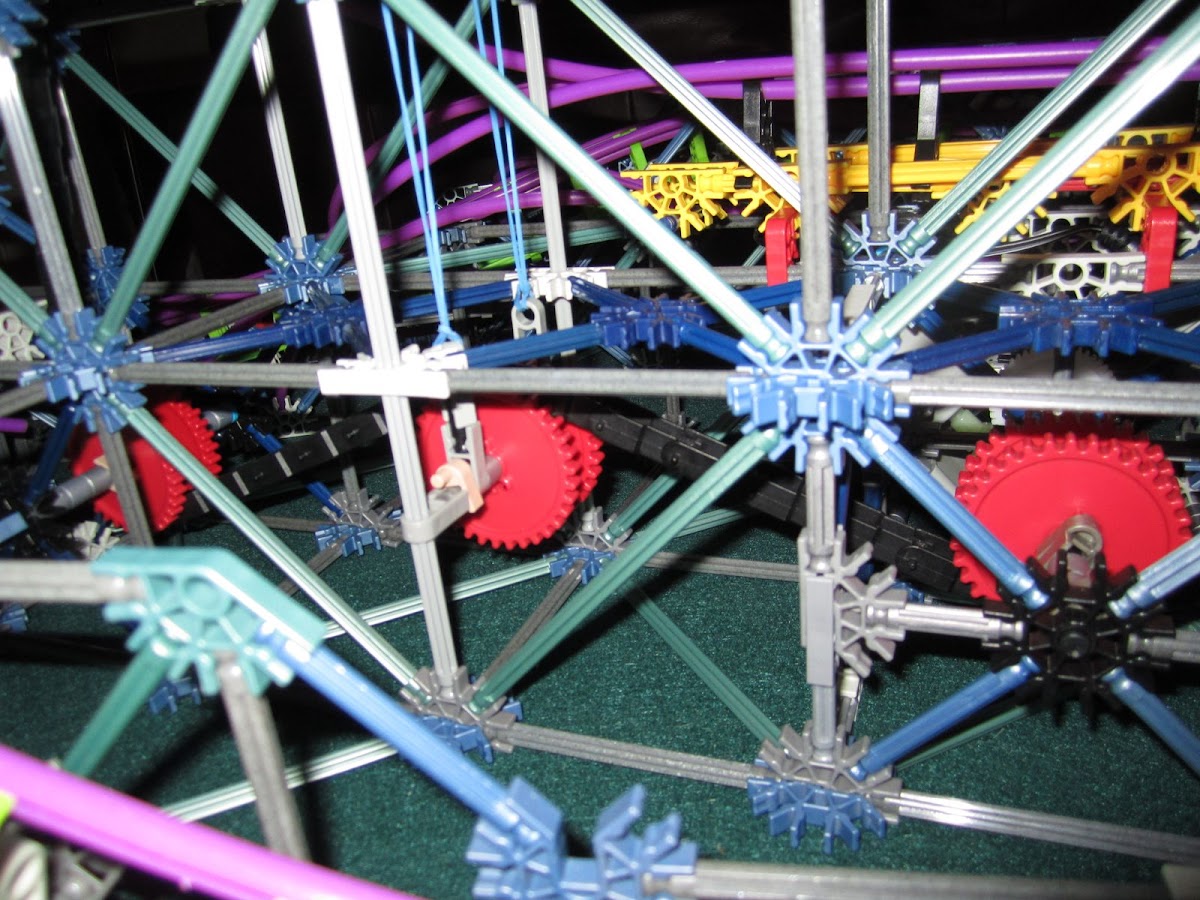
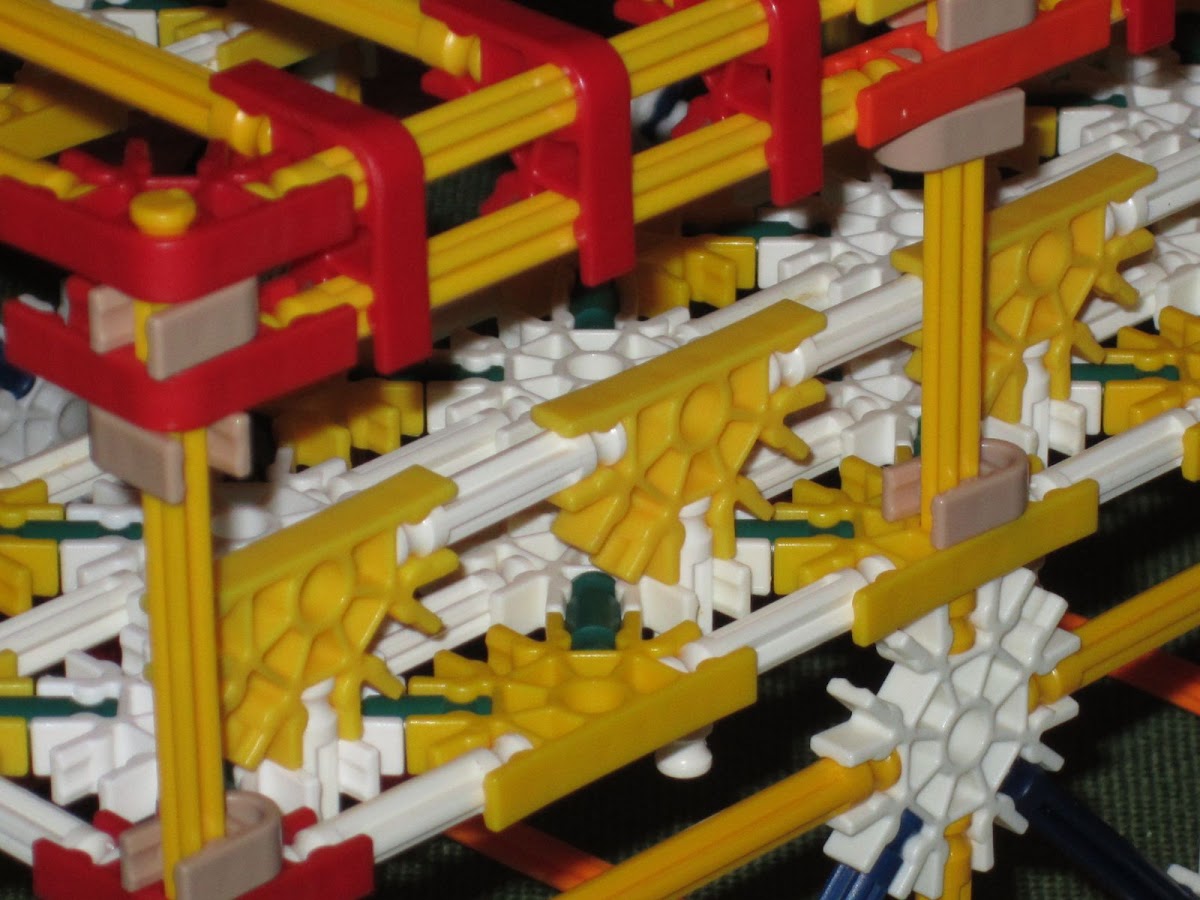
This is a storage/transfer track that will be next to the station, similar to the real coaster. I am going to have a manual track switch because it will only be used for train maintenance and I have enough to do with the Arduino controls I am already planning. Note the 4 motors for the main lift are buried under the transfer track. I am using CCTV power supplies to test things now but these motors will be driven by mosfets hooked up to a computer PSU and controlled by the Ardunio, both of which will be buried somewhere under the lift. All the wires are labeled for final hook up. Fitting everything into this coaster is a challenge.
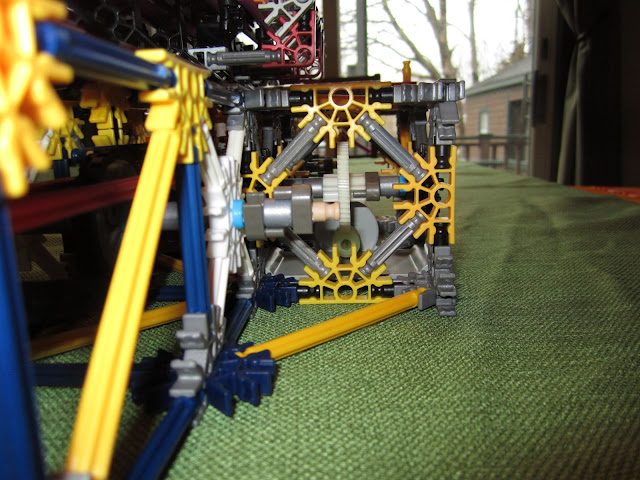
Here is the opposite view of those motors, you can see the drive gears for the main lift .
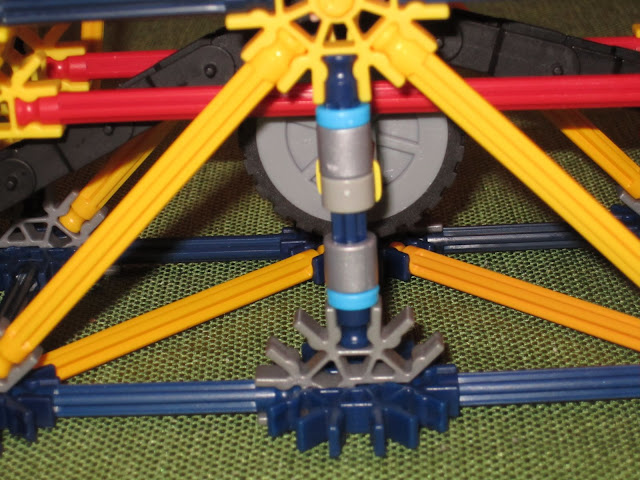
Here is the chain tensioning mechanism. I built about half of the lift hill to test everything. It runs very smoothly and is very strong. I won't build the rest of the lift until I have the coaster almost finished and know exactly how tall it needs to be.
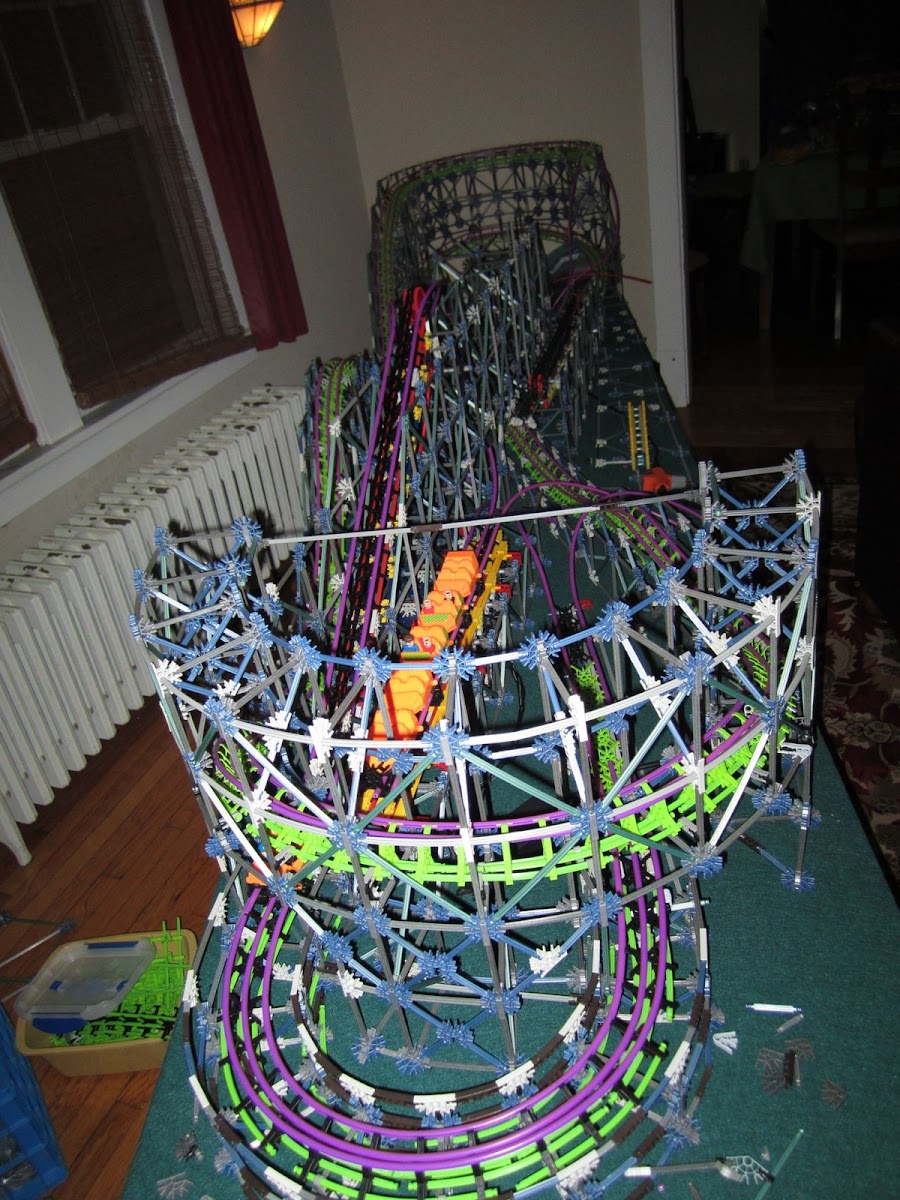
Here is a current overview from the lift end.
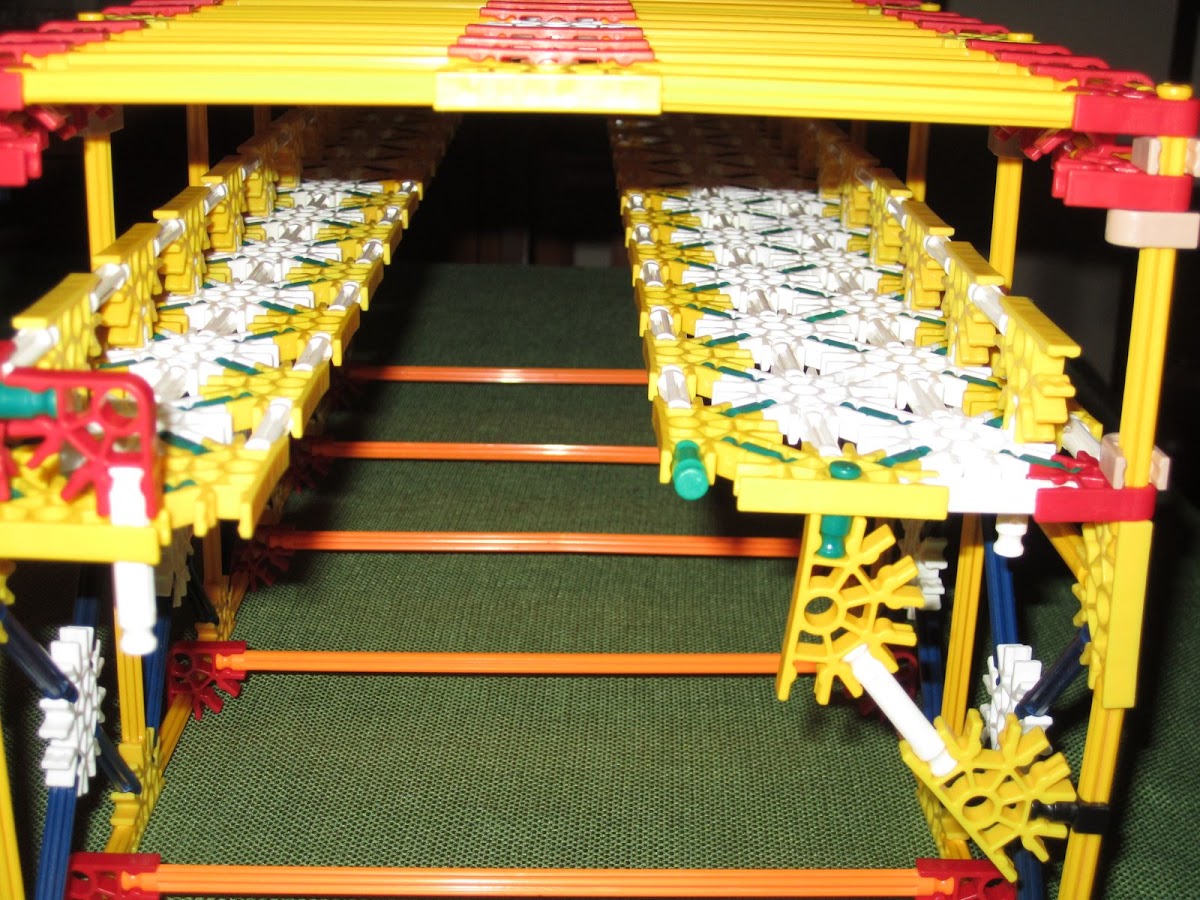
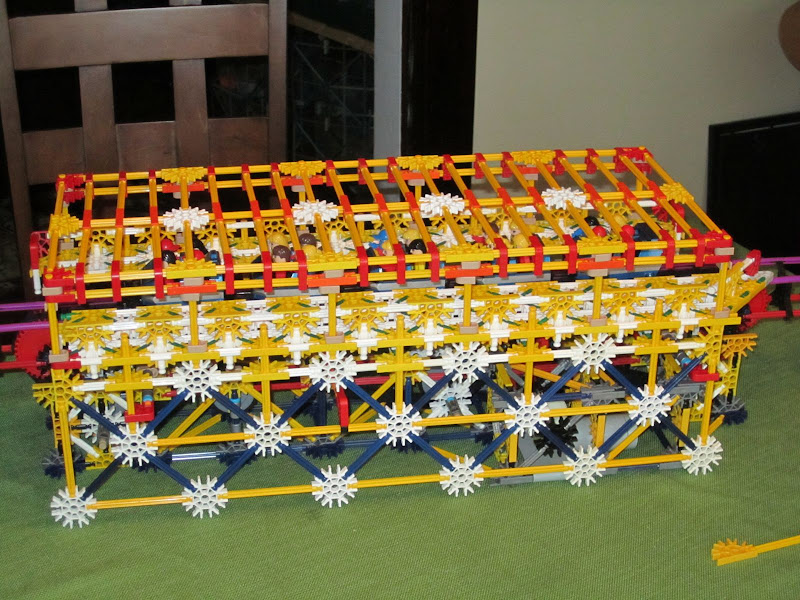
I've also built the station platform and roof. I tried a bunch of different styles and am happy with this one. It has to be built so that it can sit over the track independently of the track structure. I need to have a chain drive, motor and am still trying to get some servo-controlled brakes designed that will fit in here. I think the simple building matches the real station as much as possible.
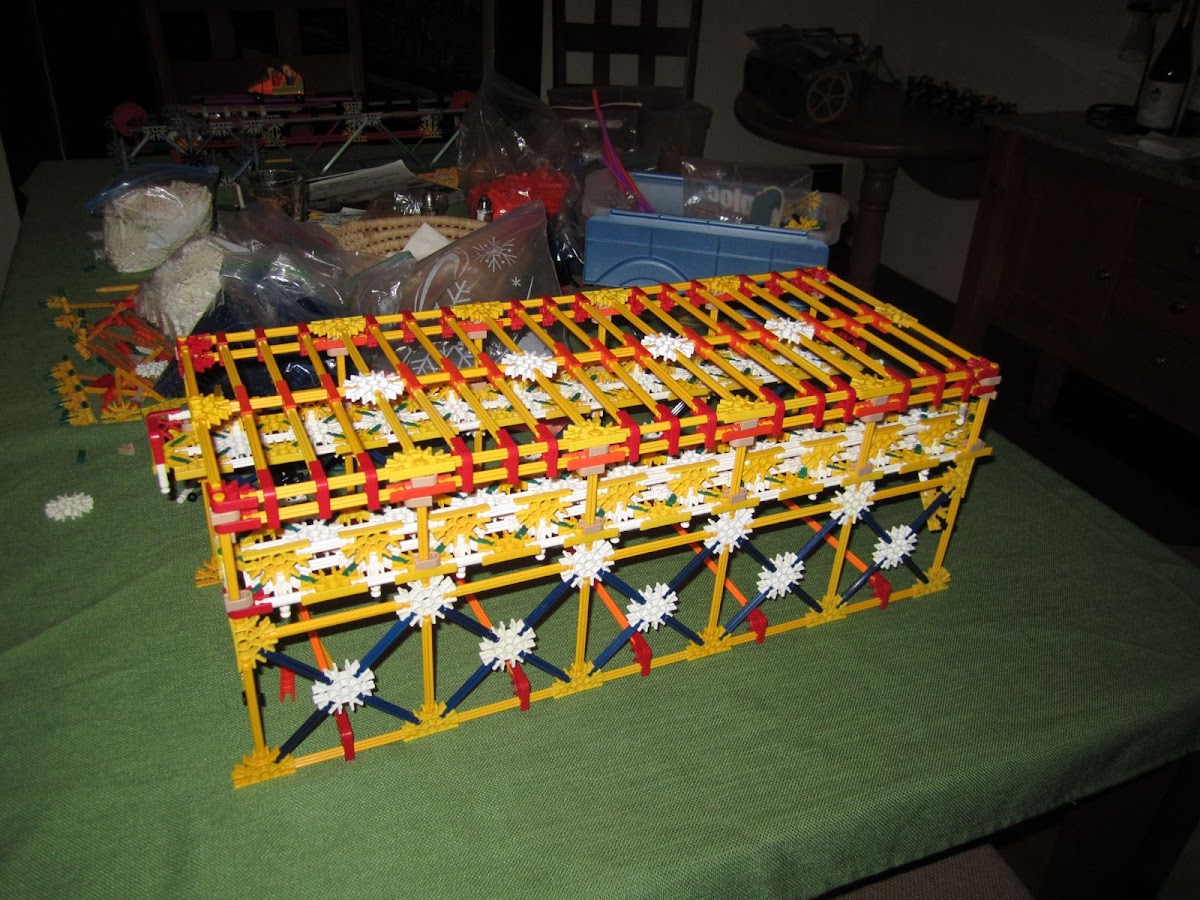
I haven't seen this technique used before (although I am sure someone has done it) I like the way the roof is supported. It is pretty strong. I was able to build the entire station without any 3D connectors, which allowed me to get a consistent color scheme, mostly yellow white and red. This will make the station stand out from the rest of the structure.
Here is the interior view. The track and car fit perfectly between the platforms and I will be able to fit the brakes under here (either static or servo controlled)
This is the pre-lift turn. One of the biggest adjustments I had to make was to move this off to one side like it is now. I had it in the middle of the bigger turn and that made it impossible to fit the station. I went through some of the old photos I found of the real coaster and realized this is how the real one was too. (My original layout was based on a NoLimits recreation someone had done and posted on the web.) I only had to move it about 4 " to the left but that involved moving the entire lift hill structure, which in turn affected the final run that crosses underneath the lift, the first big hill and brake run, which are all part of a single large structure. That small move, took me a good part of a day and a lot of planning.
This is shows the hole in the structure where the station and entrance/exit ramp will go.
This is the modified (shortened) brake run. (the brake run was one of the last things I built before stopping last year)
This is a storage/transfer track that will be next to the station, similar to the real coaster. I am going to have a manual track switch because it will only be used for train maintenance and I have enough to do with the Arduino controls I am already planning. Note the 4 motors for the main lift are buried under the transfer track. I am using CCTV power supplies to test things now but these motors will be driven by mosfets hooked up to a computer PSU and controlled by the Ardunio, both of which will be buried somewhere under the lift. All the wires are labeled for final hook up. Fitting everything into this coaster is a challenge.
Here is the opposite view of those motors, you can see the drive gears for the main lift .
Here is the chain tensioning mechanism. I built about half of the lift hill to test everything. It runs very smoothly and is very strong. I won't build the rest of the lift until I have the coaster almost finished and know exactly how tall it needs to be.
Here is a current overview from the lift end.
I've also built the station platform and roof. I tried a bunch of different styles and am happy with this one. It has to be built so that it can sit over the track independently of the track structure. I need to have a chain drive, motor and am still trying to get some servo-controlled brakes designed that will fit in here. I think the simple building matches the real station as much as possible.
I haven't seen this technique used before (although I am sure someone has done it) I like the way the roof is supported. It is pretty strong. I was able to build the entire station without any 3D connectors, which allowed me to get a consistent color scheme, mostly yellow white and red. This will make the station stand out from the rest of the structure.
Here is the interior view. The track and car fit perfectly between the platforms and I will be able to fit the brakes under here (either static or servo controlled)
Comet Recreation still underway.
Proof you never grow up if you keep playing with toys!
#63
tornado96
-

- 922 posts
VV Australia
Posted 21 January 2013 - 09:04 PM
Haha I remember this. Still just as good as it was all that time ago. I could've sworn you were further in the layout though. Snazzy looking station by the way. It'll really stand out from the metallic colours. 
#64
Witting
-

- 1077 posts
Lead Engineer
Posted 22 January 2013 - 01:58 PM
awesome to see a coater coming back to live that was started before i joined
#65
soggyhotdoggg
-
- 605 posts
Architect
Posted 22 January 2013 - 03:31 PM
this looks awesome, but how do you know it's going to make it?
#66
ForgotToGrowUp
-
-
- 1732 posts
Lead Engineer
Posted 22 January 2013 - 04:27 PM
That's why I am building it backwards. Just have to make each element high enough for it to get to the next. Worst thing that can happen is the lift hill ends up begin much higher than the scale of the original ride. So far I think it will be reasonable. Before I started taking things apart it made it from the 3rd to last turn to the brake run. That's about half the circuit.
Comet Recreation still underway.
Proof you never grow up if you keep playing with toys!
#67
Cobra Roller
-

-

- 728 posts
I have all six Infinity Stones
Posted 22 January 2013 - 05:59 PM
Yay! I'm always a fan of recreations, and this looks awesome. Great job on the suppors and the overall aesthetics. I'm looking forward to the finished product 
Screen Shot 2013-01-08 at 7.33.20 PM by tennispro95, on Flickr
#68
rollercoasterfanatic919
-
-
- 3357 posts
Switch 360!
Posted 22 January 2013 - 10:19 PM
Excited to see this is still being built!  I like the roof support structure in the station a lot, it looks very refined and low-profile. It appears to be going well, so good luck with the remainder of the layout!
I like the roof support structure in the station a lot, it looks very refined and low-profile. It appears to be going well, so good luck with the remainder of the layout!


MF | Toro | TTD | Maverick | Ka | Griffon | Nitro | Storm Runner | Skyrush | Phoenix
#69
Balu1234
-

-

- 30 posts
Construction worker
Posted 19 February 2013 - 07:59 AM
When comes the next Update ? The coaster is really Good i love it
lover <3
#70
Maxlaam
-

-

- 8116 posts
Tracing Tyrant's Steps
Posted 19 February 2013 - 08:15 AM
It's not common to ask for updates, but this was and still is a very promising project!
SSCoasters Administrator
Read The Forum Rules(smart)


#71
ForgotToGrowUp
-
-
- 1732 posts
Lead Engineer
Posted 19 February 2013 - 08:25 AM
Thanks for the interest. I know it is VERY slow. Trust me I wish I could work on it more than I do. This has already been underway for a year. It's tough to keep a house and boat and family going, work full time etc..... Every tiime I plan to spend a block of time working on it some pipe freezes or the heating system leaks, dishwasher needs replacing, or we get slammed with a blizzard.... it never ends!
Rest assured this WILL NEVER BE CANCELLED. I am too into this particular coaster and have too much time invested. I am still hoping to finish by summer and find a place to display it. (going to have to remove a doorway to get it out!)
Verbal update, nothing worth taking picutres of at this point. I've got the guts of the station built, but am still trying to find a way to fit servo-actuated brakes into the small space I haveto work with. Once I get the station and all the mechnicals completed the rest of the coaster build should go pretty quickly. I still have to write a lot of Arduino code too.
Comet Recreation still underway.
Proof you never grow up if you keep playing with toys!
#72
Dragon
-

-

- 1481 posts
ROAR!
Posted 19 February 2013 - 06:10 PM
Great work so far!, i can't wait till the end, doesn't matter how long it takes!
#73
ForgotToGrowUp
-
-
- 1732 posts
Lead Engineer
Posted 24 February 2013 - 11:05 PM
I think the station is pretty much finished and ready to get installed in the coaster.
A few small changes to what I had mostly to firm up the decks. You can see in the last picture of my previous post I only had a crude brace holding up the deck. It started to sag after a few days. I shored that up with a row of half moons under the deck attached to the white rids holding the railings. These are in turn attached to the halfmoons below the deck, making up the top of the yellow box of the structure. I did this on both decks and it is a lot stronger. No more sag.
Here is the working part of the station. I had to build it with blue boxes to fit inside the structure. The orange rods with the spacers and red 3ways are the only connections between this part and the structure. The orange rods with spacers position the station correctly on the track and this arrangement makes it easy to install the mechanical portion of the station seperately from the structure. And makes it possible to go in and fix something mechanical should it break.
The temporary yellow rods are there to show how it attaches to the structure. ( in the end I did away with the middle orange rod)
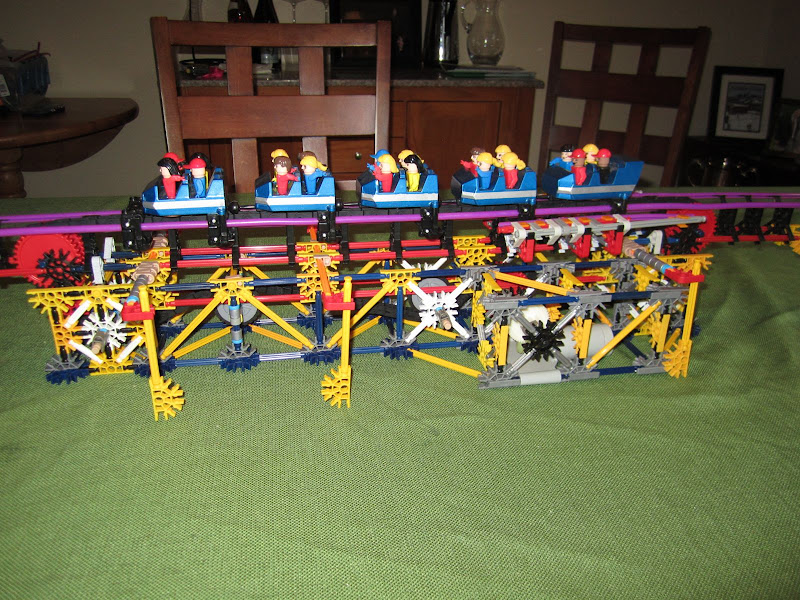
Close up of orange postiioning rod

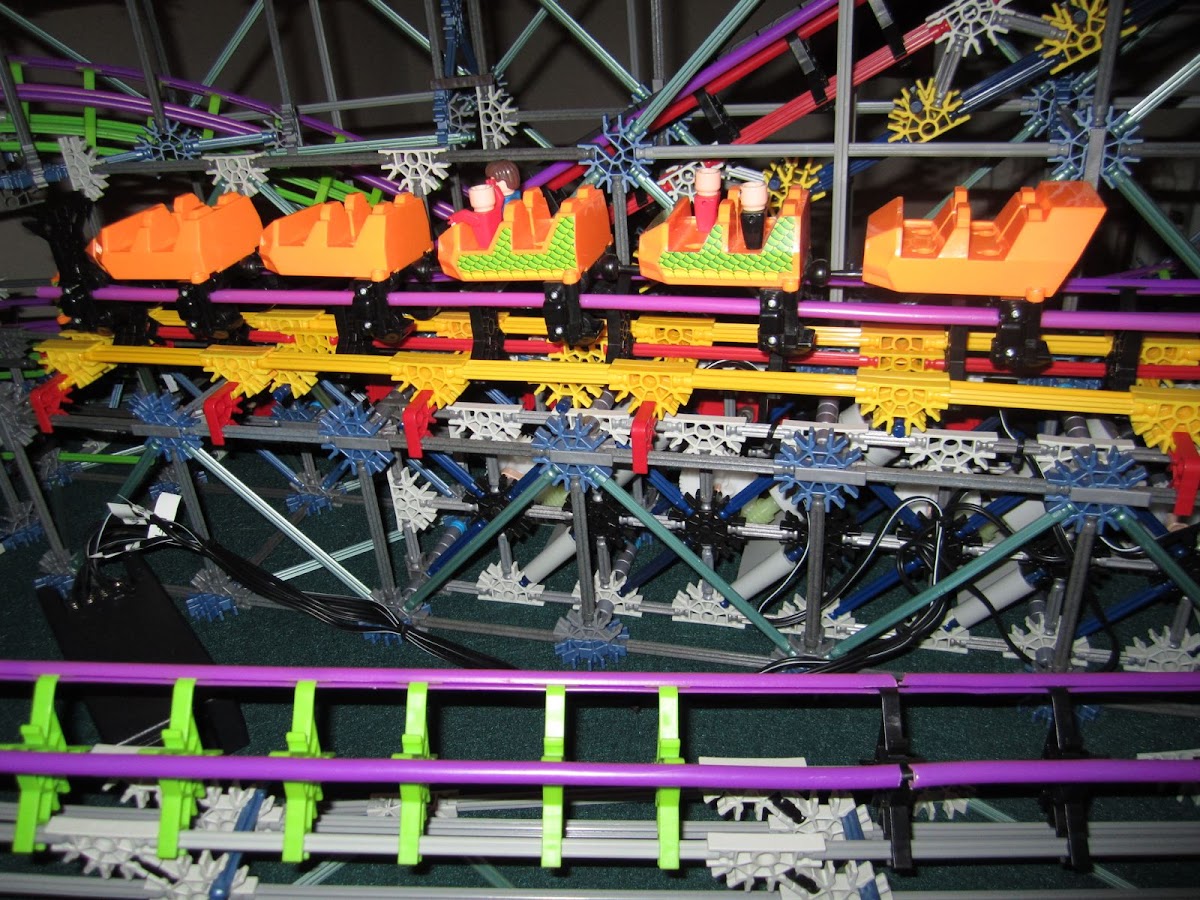
Small chain tensioner and rubber idler wheels make it run smooth
Modified the side friction brakes I have used in the past to fit this tight space.
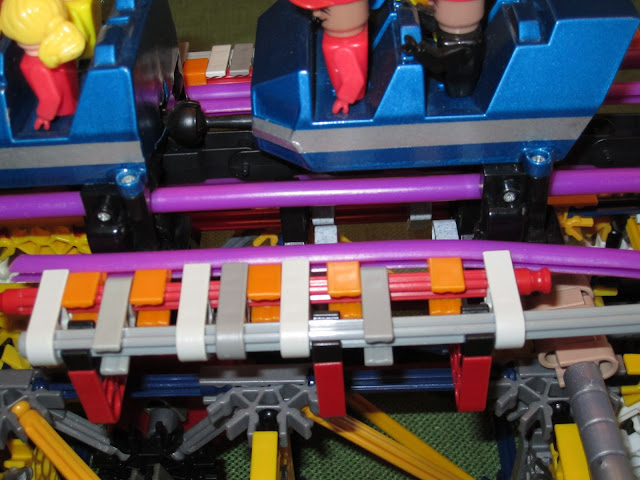
Top view of brakes. These fit under the deck. I spent a lot of time working on servo adjustable brakes. Had something close to working but could never get it to fit the tight space so went with static brakes. Tested them on a full weighted train and should be enough braking power. (only coming into station from the longer brake run) (hmm just notice a missing yellow rod...have fix that!)
tight fit with motor and brakes.
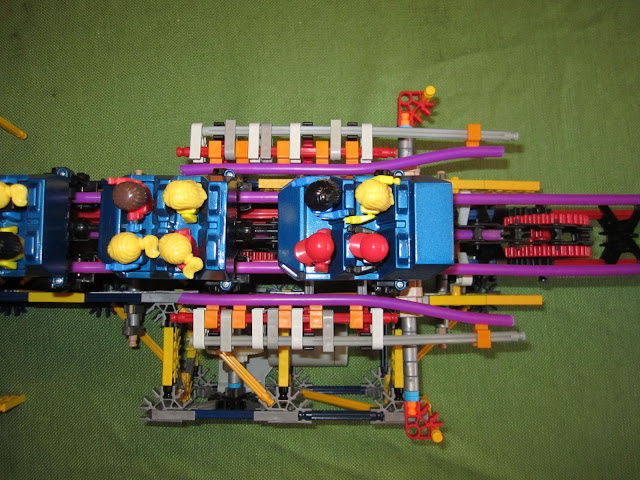
Here is how it all fits together. You can also see more of the bracing for the deck.
Don't Knex people all look drunk?

A few small changes to what I had mostly to firm up the decks. You can see in the last picture of my previous post I only had a crude brace holding up the deck. It started to sag after a few days. I shored that up with a row of half moons under the deck attached to the white rids holding the railings. These are in turn attached to the halfmoons below the deck, making up the top of the yellow box of the structure. I did this on both decks and it is a lot stronger. No more sag.
Here is the working part of the station. I had to build it with blue boxes to fit inside the structure. The orange rods with the spacers and red 3ways are the only connections between this part and the structure. The orange rods with spacers position the station correctly on the track and this arrangement makes it easy to install the mechanical portion of the station seperately from the structure. And makes it possible to go in and fix something mechanical should it break.
The temporary yellow rods are there to show how it attaches to the structure. ( in the end I did away with the middle orange rod)
Close up of orange postiioning rod
Small chain tensioner and rubber idler wheels make it run smooth
Modified the side friction brakes I have used in the past to fit this tight space.
Top view of brakes. These fit under the deck. I spent a lot of time working on servo adjustable brakes. Had something close to working but could never get it to fit the tight space so went with static brakes. Tested them on a full weighted train and should be enough braking power. (only coming into station from the longer brake run) (hmm just notice a missing yellow rod...have fix that!)
tight fit with motor and brakes.
Here is how it all fits together. You can also see more of the bracing for the deck.
Don't Knex people all look drunk?
Comet Recreation still underway.
Proof you never grow up if you keep playing with toys!
#74
Micro Mike 21
-
- 604 posts
U know......
Posted 24 February 2013 - 11:18 PM
That is a very nice station!!!! I hope you have no speed problems whatsoever, but of you do, try and remove the figures from the seats, those figures rattle around causing speed problems, but that is just a tip. Great work so far though!!!

#75
DDRman732865
-

-
- 5251 posts
Going Back for Master's for some reason
Posted 25 February 2013 - 12:44 AM
You put a lot of little touches into this, and they make it look brilliant.

The Jungle Beast Luminous Infernal Hurricane Forbidden Mine Expedition Sleigh Ride Volcanic Doomfire Rorschach Terminator: Clash of the Machines Rock'n'Rolla
#76
ForgotToGrowUp
-
-
- 1732 posts
Lead Engineer
Posted 25 February 2013 - 06:28 AM
The people are all glued in. I used this train on my last coaster. They don't rattle and the train runs great
#77
Maxlaam
-
-
- 8116 posts
Tracing Tyrant's Steps
Posted 25 February 2013 - 06:52 AM
Station and brakes are spiffy, lots of detail, lots of thought and work. Brilliant!
Duhh, you glued them in, I would look like that too if I had to ride it all day and night because my butt was glued to the seat.
The people are all glued in. I used this train on my last coaster. They don't rattle and the train runs great
Don't Knex people all look drunk?
Duhh, you glued them in, I would look like that too if I had to ride it all day and night because my butt was glued to the seat.
SSCoasters Administrator
Read The Forum Rules(smart)
#78
Helmut
-
-
- 3012 posts
Das Beste oder Nichts
Posted 25 February 2013 - 10:47 AM
Good station. It looks nice and colourfull.
#79
CW5X
-

-
- 3579 posts
Wha?
Posted 25 February 2013 - 11:17 AM
Such a sweet design and compact too. The tight space it needs to fit in make this all the more impressive.
Silverstar Nemesis Poseidon Air Saw The Swarm Nemesis Inferno Colossus RageThe Smiler Oblivion Shockwave GeForce Apocalypse Detonator Kumali Mumbo Jumbo Atlantica Supersplash Velocity Blue Fire Megacoaster Pepsi Max Big One Wodan
If only I had more space/pieces. Delete as appropriate
#80
Rollerfreak987
-

-

- 2448 posts
definitely gone crazy
Posted 25 February 2013 - 07:23 PM
Those are some beautiful trains! I like the station too, except the red connector that is at an odd angle in one of the pictures.
1- Time Traveler 2- Magnum XL-200 3- The Voyage 4- Velocicoaster 5-Iron Gwazi 6- Phantom's Revenge 7- The Beast 8- The Legend 9- Tiested Timbers 10- Steel Vengeance
Follow me on Instagram @coastergeek987
Credit Count: 305


