Jump to content


Marvel Rivals Hypercoaster - Completed!!

ball jester1960

  • Please log in to reply
23 replies to this topic

#1 Taipan

Taipan

    Newbie

  • PipPip
  • 26 posts

Posted 14 September 2019 - 04:05 AM

G'day everyone! Apologies for having posted only once here before; http://www.sscoaster...trolled-launch/ I've followed this site for many years checking out all the awesome models here! And learnt a lot & more.

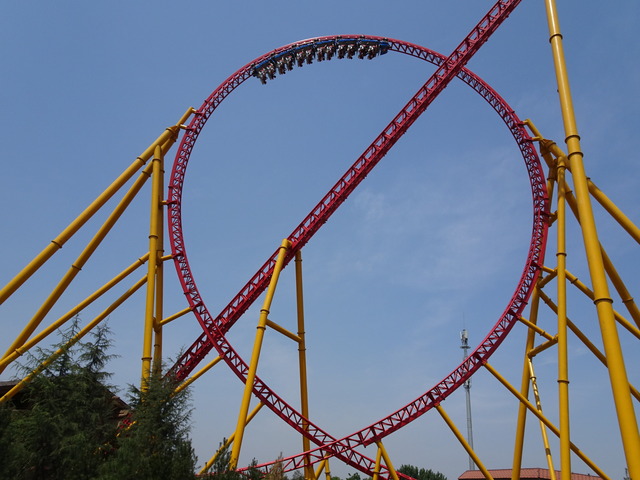
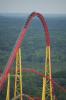
In the above link was my only custom made model built in 2003 & never touched my K'nex again until beginning of this year when I went to WBMW Australia with my wife for my 40th birthday and rode DC Rivals Hypercoaster! Wanted to recreate it and came home and pulled out a SS set and built the junior coaster with my 8yro nephew as a warm up.

As I had only 2 SS sets, went nuts on the local equivalent of ebay and Facebook marketplace and bought another 10 SS and 5 RR kits!! So much cheaper than when new!

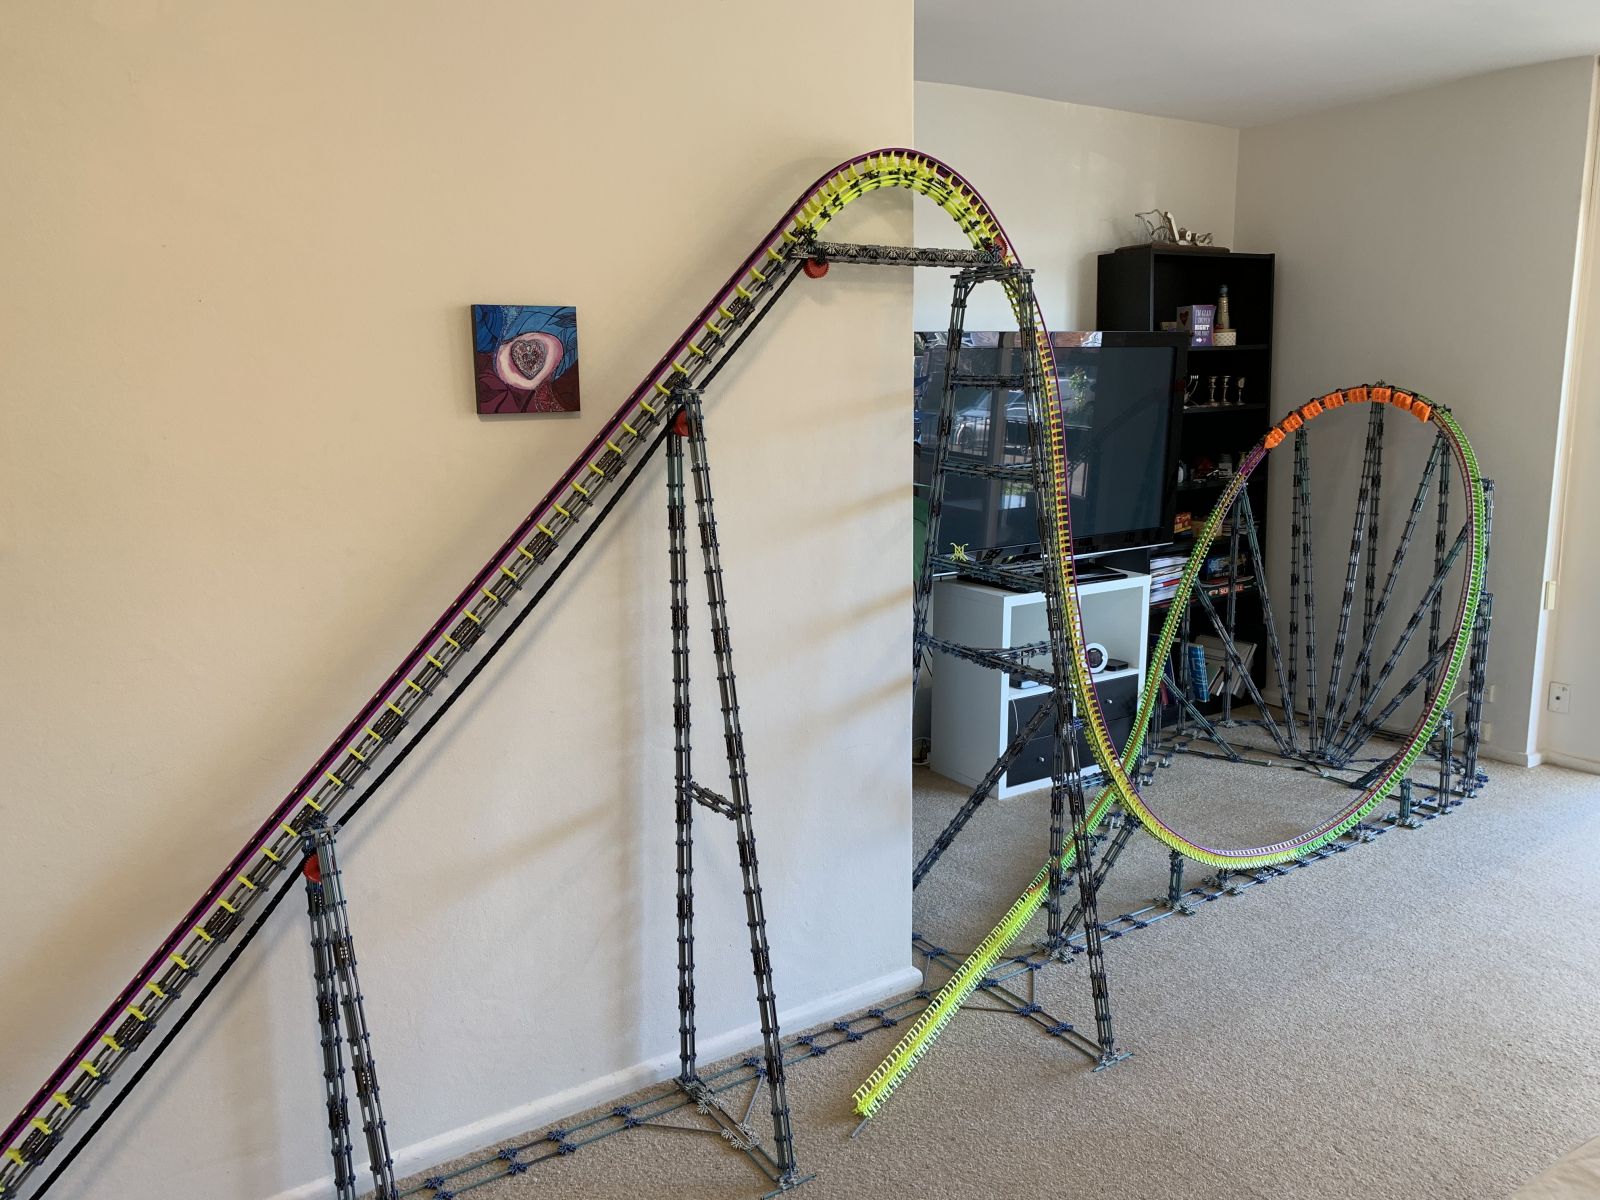
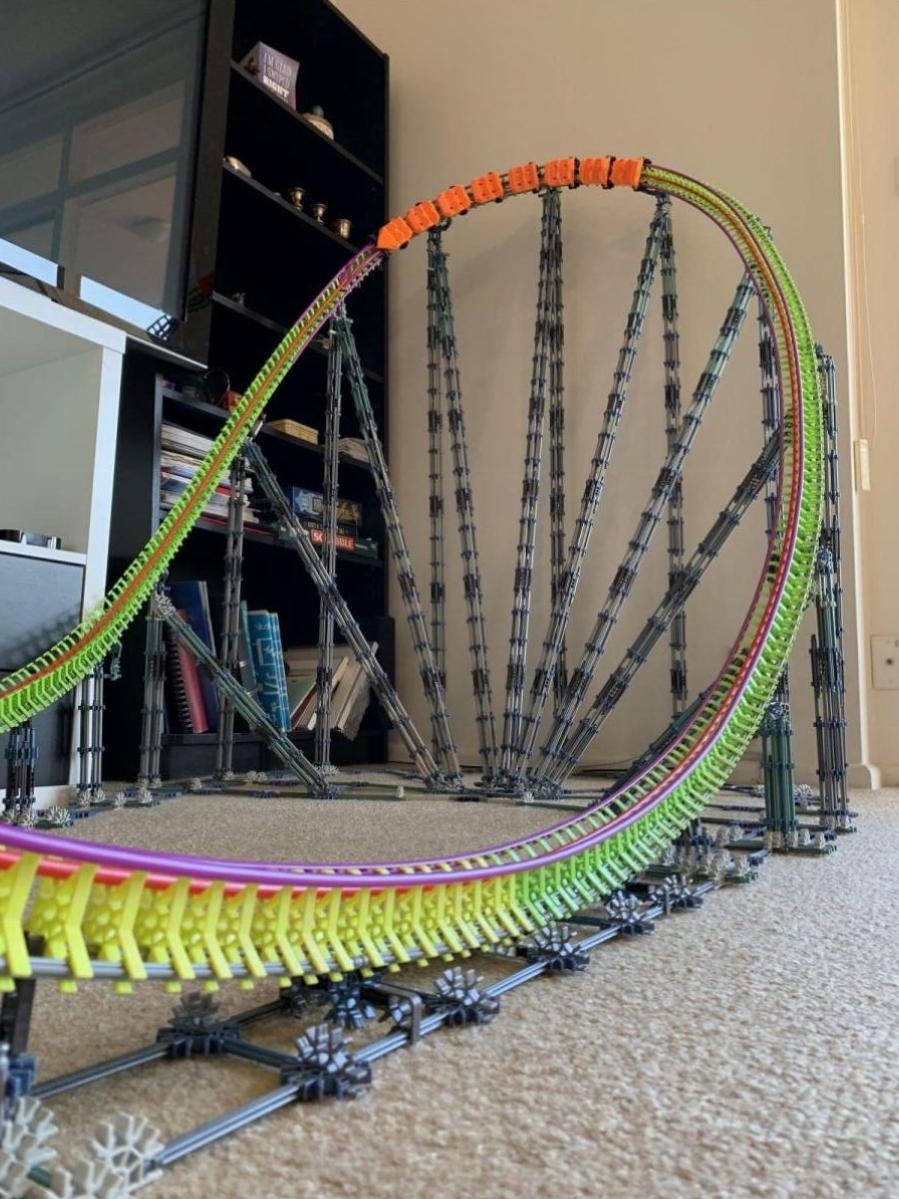
However our apartment is too small for an exact recreation so have heavily modified the layout. Thought I'd share pics with you guys. This is insanely ambitious for only my 2nd custom build but am determined to see it to the end!! Very steep learning curve as I go.

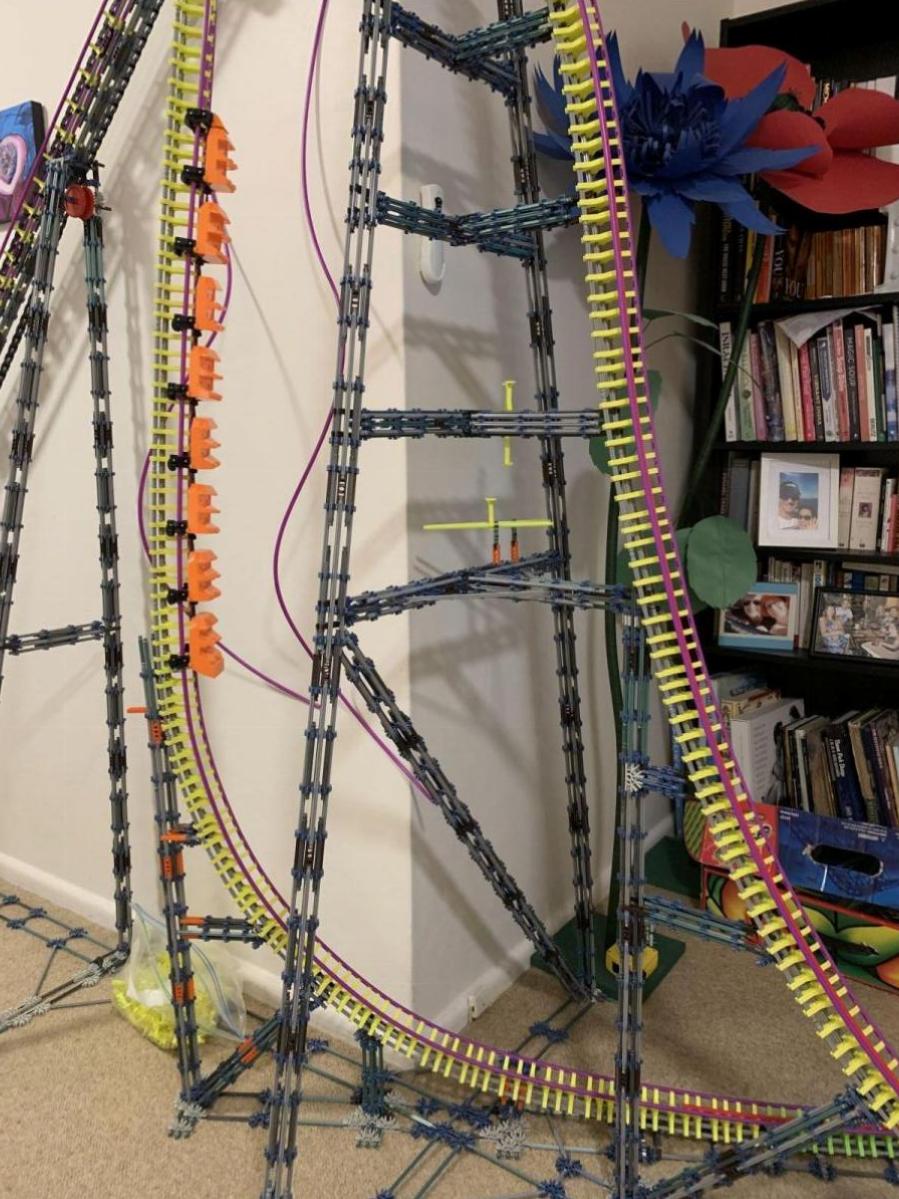
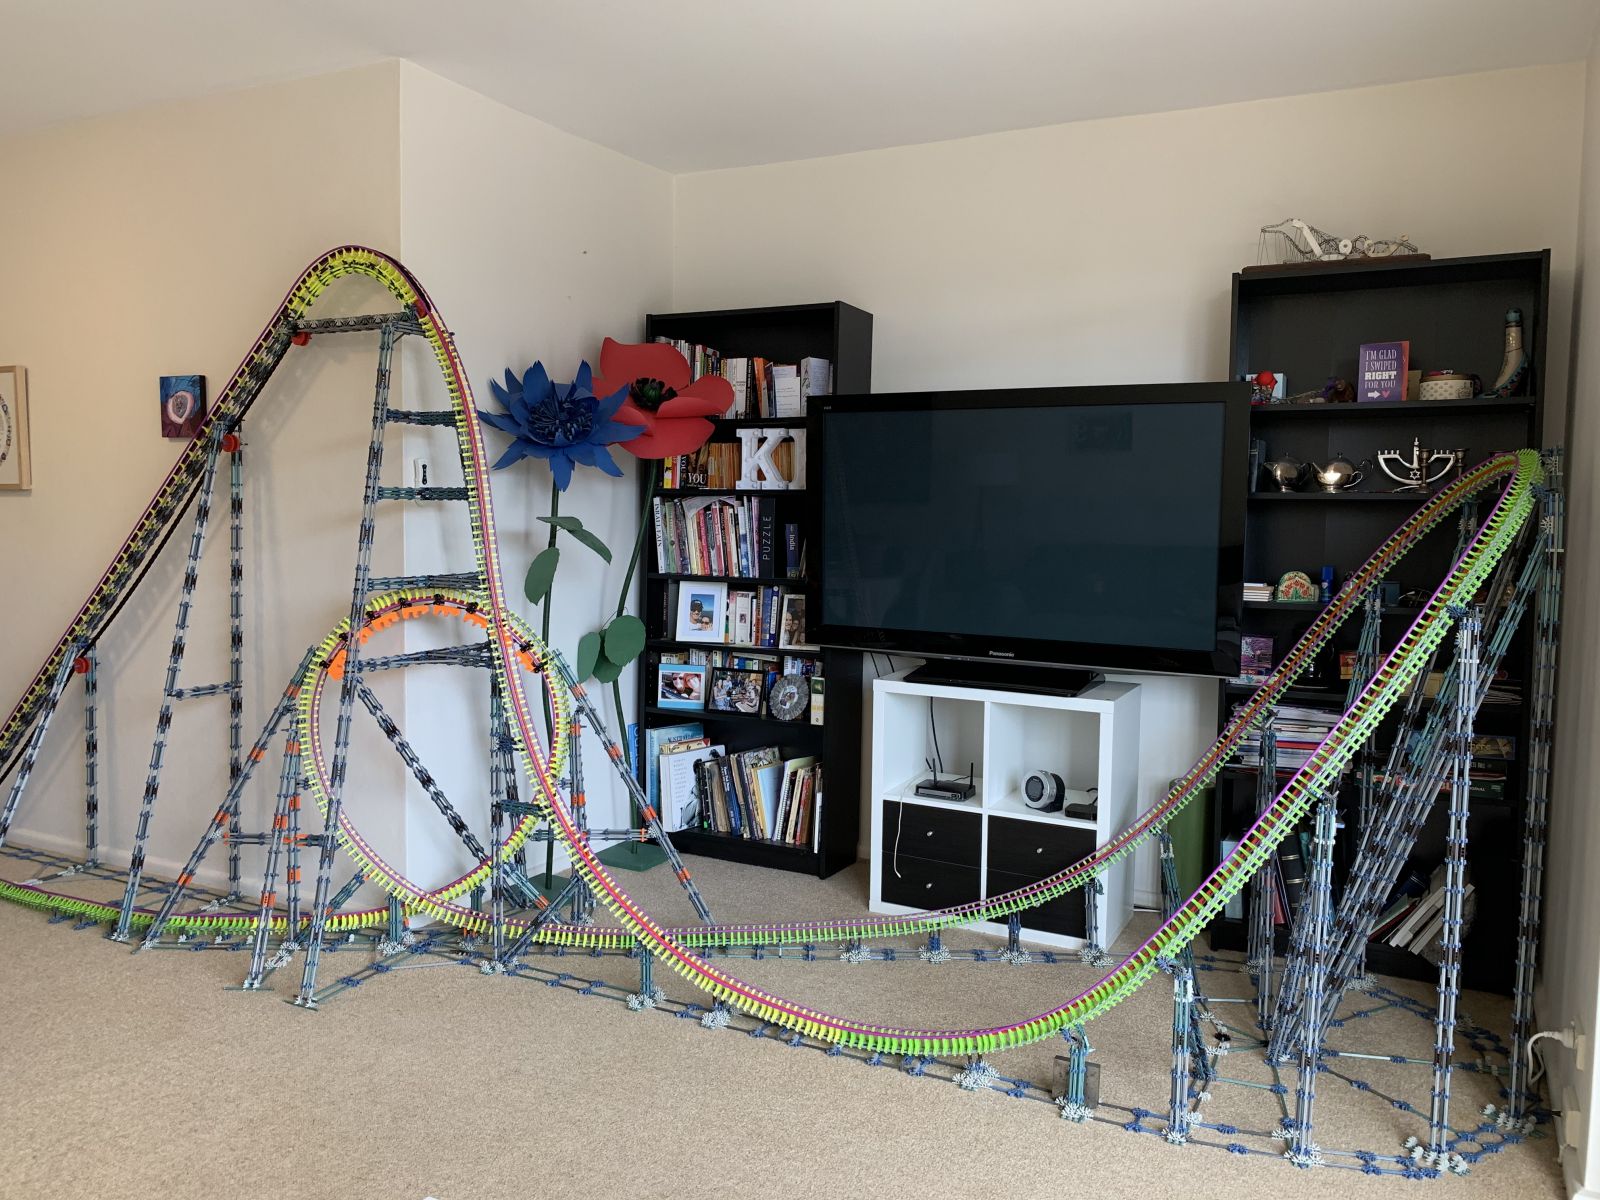
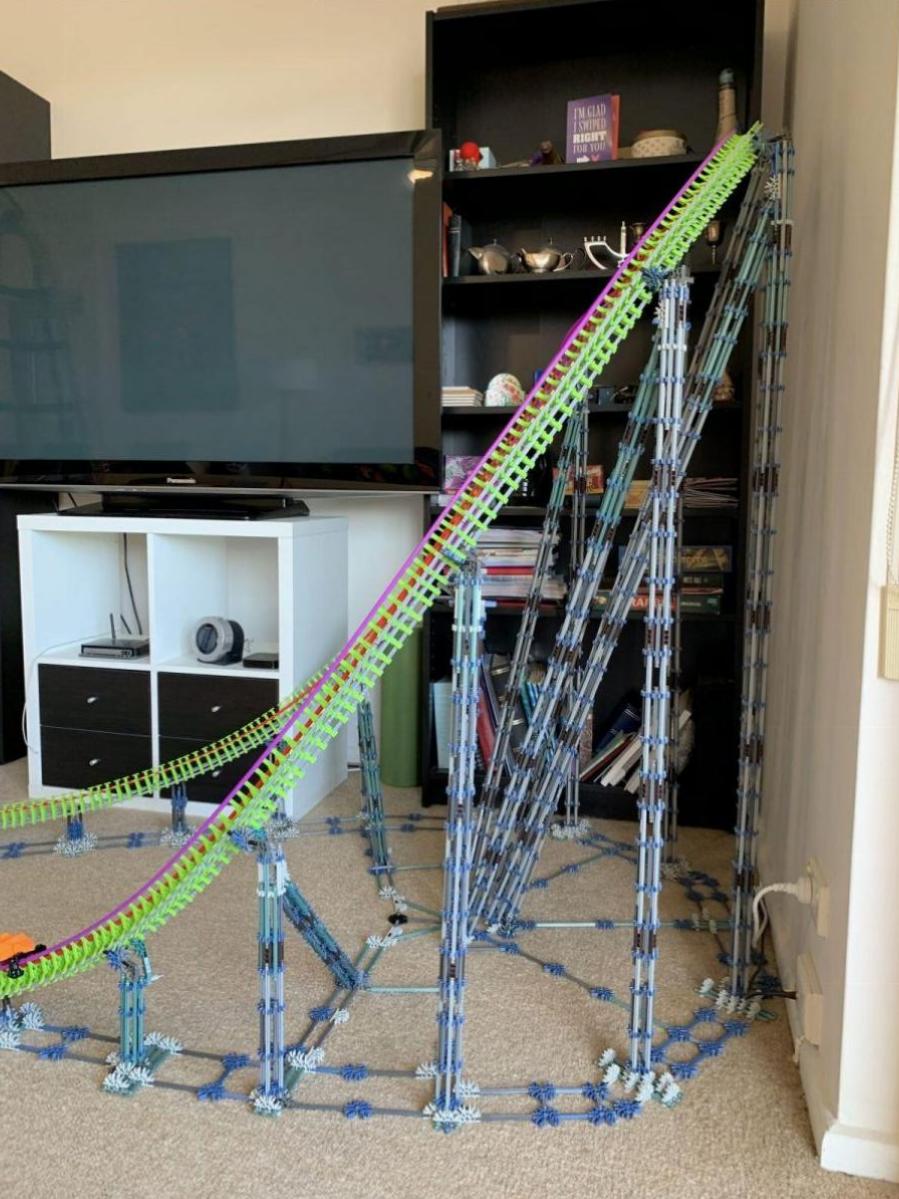
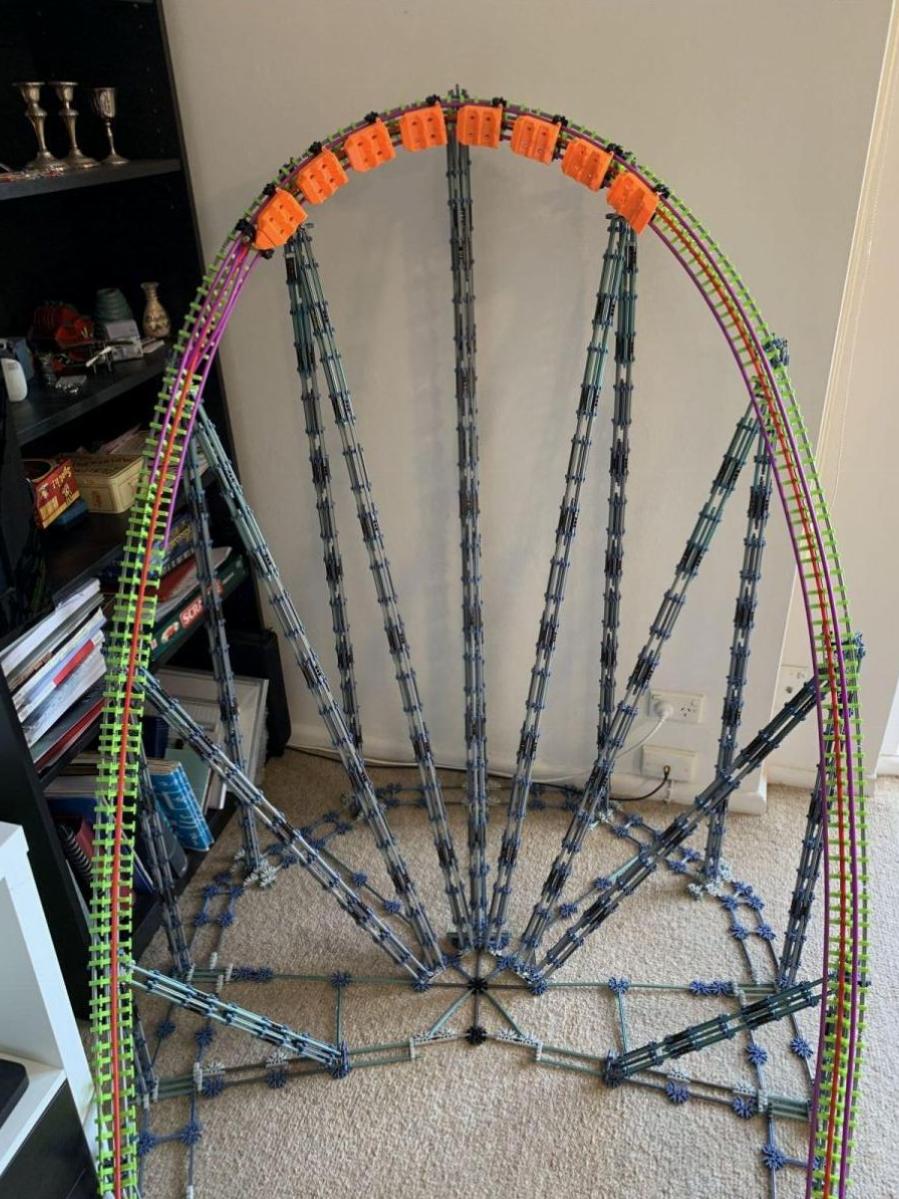
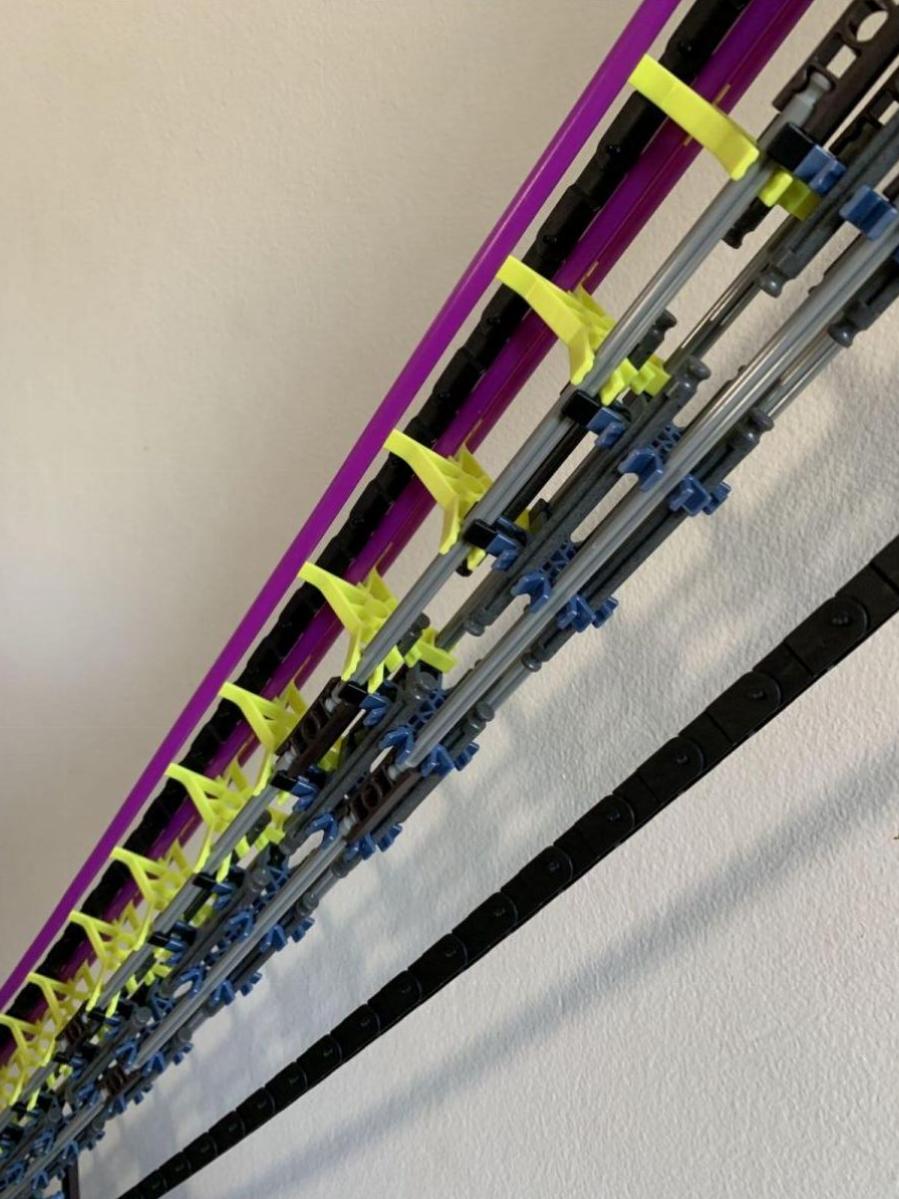
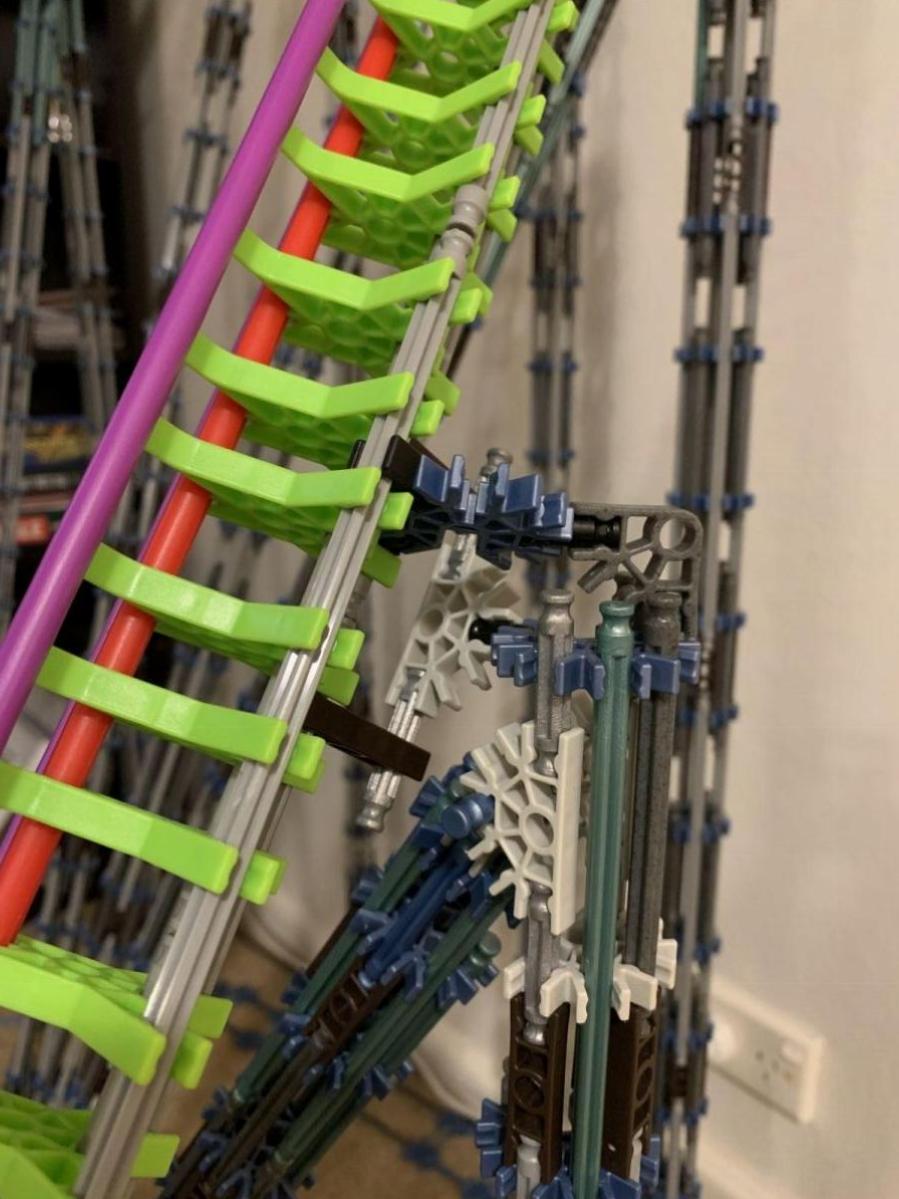
The model stands at 203cm/80 inches. That is a 147cm/58 inch TV for reference. Next is building the non-inverting loop through the drop support. You can see a yellow crosstie on the 2nd horizontal support from the ground, that is the top of the loop.

Any comments are welcome and thanks for looking! :)

gallery_3157_1098_941686.jpeg


gallery_3157_1098_3220749.jpeg

gallery_3157_1098_813980.jpeg

gallery_3157_1098_530003.jpeg

gallery_3157_1098_2459369.jpeg

Edited by Taipan, 08 July 2020 - 06:54 PM.


  • JohnnyR24 likes this

#2 SCM

SCM

    Omnipotent Lucid Dreamer

  • 2039 posts

Posted 14 September 2019 - 01:01 PM

Hmm. This looks promising. :) I've never made a non-inverting loop before, but I'd have to imagine that they kill a lot of speed due to the rapid changes in direction. I could be wrong, but I don't think the train will be able to make it, and if it does, there won't be much speed left to work with afterwards. Since it sounds like you want to learn, I'll be a little more critical than usual here. 


The shaping could use some work. The lift crest is really tiny. If you have the room, I'd recommend making it twice as wide so that it looks smoother. The drop pullout seems fine, but the overbank could use some work. I've taken the liberty to make something for you. :) 

Suggestion for Taipan

I made sure to keep any space issues you may have in mind. I'm not saying you have to do this, but I'd highly recommend it. A little about what's going on in this image: the purple line is for the left side and the blue line is for the right side. I didn't just slap on those two lines and call it a day. Zoom in on them and you'll find that not only do they show the overall suggested shape, but they also show the suggested rate of banking. For the smoothest possible overbank, you don't ever want the track to settle. At all. Here's how: 


While you bend the track upwards on the Y-axis and to the left on the X-axis, you should gradually bank the track to the left the entire time. The halfway point of the overbank should be on the very top of it. From there, you'll have to slowly undo the bending and the banking of the track. Hopefully this helps, and I hope everything goes well for you with this project. :D 


  • Taipan likes this

I'm not done building yet. 

Glimpses

Speed Coaster Master


#3 nj_thrills

nj_thrills

    Advanced Member

  • PipPipPip
  • 30 posts

Posted 14 September 2019 - 01:24 PM

wow!!! this looks really awesome. Its quite large, it reminds me of some of the early 2010's models that surfaced here. I have a question though- could you send me a picture of your lift spine? lol


  • Taipan likes this

#4 Taipan

Taipan

    Newbie

  • PipPip
  • 26 posts

Posted 14 September 2019 - 06:40 PM

Hmm. This looks promising. :) I've never made a non-inverting loop before, but I'd have to imagine that they kill a lot of speed due to the rapid changes in direction. I could be wrong, but I don't think the train will be able to make it, and if it does, there won't be much speed left to work with afterwards. Since it sounds like you want to learn, I'll be a little more critical than usual here. 


The shaping could use some work. The lift crest is really tiny. If you have the room, I'd recommend making it twice as wide so that it looks smoother. The drop pullout seems fine, but the overbank could use some work. I've taken the liberty to make something for you. :)


I made sure to keep any space issues you may have in mind. I'm not saying you have to do this, but I'd highly recommend it. A little about what's going on in this image: the purple line is for the left side and the blue line is for the right side. I didn't just slap on those two lines and call it a day. Zoom in on them and you'll find that not only do they show the overall suggested shape, but they also show the suggested rate of banking. For the smoothest possible overbank, you don't ever want the track to settle. At all. Here's how: 


While you bend the track upwards on the Y-axis and to the left on the X-axis, you should gradually bank the track to the left the entire time. The halfway point of the overbank should be on the very top of it. From there, you'll have to slowly undo the bending and the banking of the track. Hopefully this helps, and I hope everything goes well for you with this project. :D


Thanks! I know the NI loop might kill the speed but hoping the train will make it through as that's the signature element here, after that is a small inclined dive loop like on DC Rivals followed by another lap under what I've built so far with a couple of corkscrew hills & bunny hops etc. It won''t be a very long coaster when done.


I tried to make the crest similar in size to DC Rivals. It was originally too small, just 2 flexi-rods in length but added another.


xtls5p7lhpfz.jpg


I used MF's first overbank as a template for mine but steeper/taller and less banked. I know from the side mine is rather straight but from other angles looks fine & the train clears it easily. If I were to do it your way wouldn't it look more like a cutback & therefore inverted??


milenium-force-06.jpg


wow!!! this looks really awesome. Its quite large, it reminds me of some of the early 2010's models that surfaced here. I have a question though- could you send me a picture of your lift spine? lol


Thanks mate!!  :D  Here you go, I went for the most economical method as to use as little parts as possible!


gallery_3157_1098_1585591.jpeg


#5 SCM

SCM

    Omnipotent Lucid Dreamer

  • 2039 posts

Posted 14 September 2019 - 08:18 PM

If I were to do it your way wouldn't it look more like a cutback & therefore inverted??

Nope. The banking would be the same. My suggestion is meant to give a smoother appearance. Look at the pullout of the first drop, and then look at the pullin of the overbank. Compared to the size of the pullout, the pullin is quite small, and then the overbank is large so it doesn't flow well. Proportions are everything, and it's not just for looks. Smooth transitions help the train maintain speed. If the train has to sharply switch directions, you lose speed. 


An 8-car train is heavy enough as it is even when it's not moving. Newton's 2nd law: Force = Mass x Acceleration. Now I couldn't do math if my life depended on it, but as I've said many years ago in the old chatbox "one does not simply fvck around with a fully-weighted six car train". The force the train exerts on the track becomes multiplied when it moves. A lot of the energy gets lost when the train makes any sharp movements. 


Edited by SCM, 14 September 2019 - 08:55 PM.


  • Taipan likes this

I'm not done building yet. 

Glimpses

Speed Coaster Master


#6 RCT2123

RCT2123

    Most Rides Cancelled :-)

  • 5771 posts

Posted 16 September 2019 - 02:20 PM

Outside of SCM being a tad dramatic  :P 
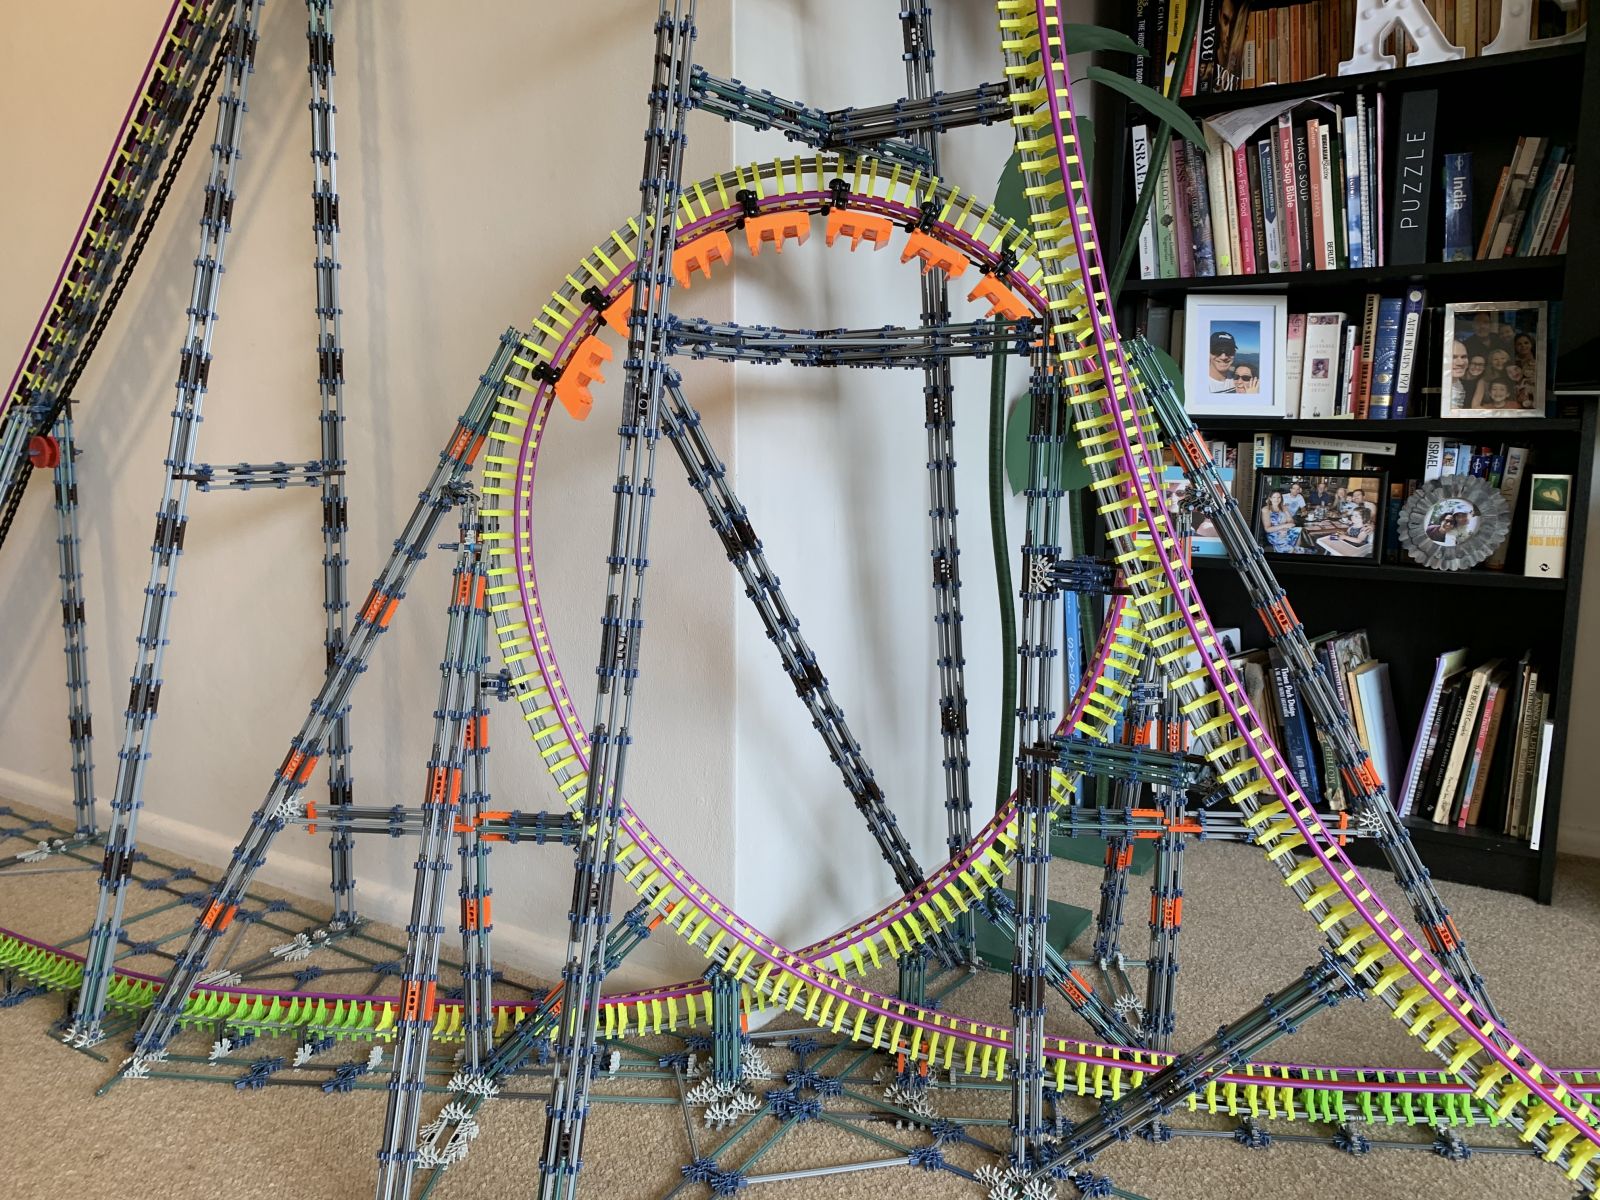
he's right about the shaping on that overbank.  The pull-in is too small compared to the pull-out of the drop, so it looks a bit off.  You have a tight pull-in, a long straight section of banking, and then the top. You could use that straight section instead for increasing the size of the pull-in.  It honestly doesn't look that bad as is, just a tip if you're look for perfection.  If it's going to discourage you to death, don't bother.


  • Taipan likes this

Posted Image


#7 Taipan

Taipan

    Newbie

  • PipPip
  • 26 posts

Posted 19 September 2019 - 04:22 AM

LOL. I took another pic side on to show that I mirrored the pull-in with the drop pull-out to make it look symmetrical. I can see that a shallower pull-in would've been better but put so much time into the overbank gonna mark it up to a learning experience and leave it as it is.


gallery_3157_1098_3331106.jpeg


The reason for the extended banking is I have only SS & RR sets, no other ones including ball & socket joints which would allow more adjustability!


gallery_3157_1098_2796178.jpeg


I built the first quarter of the loop then a vertical spike to test how high the train would go. The pic below shows this - pinned train where it went. Was hoping it would go high enough to make the upright crosstie on top of the upper support. However more like the one below with orange connectors - that is getting too small for a NI loop. I agree with SCM that the twist would rob the train of a fair bit of speed  :( 
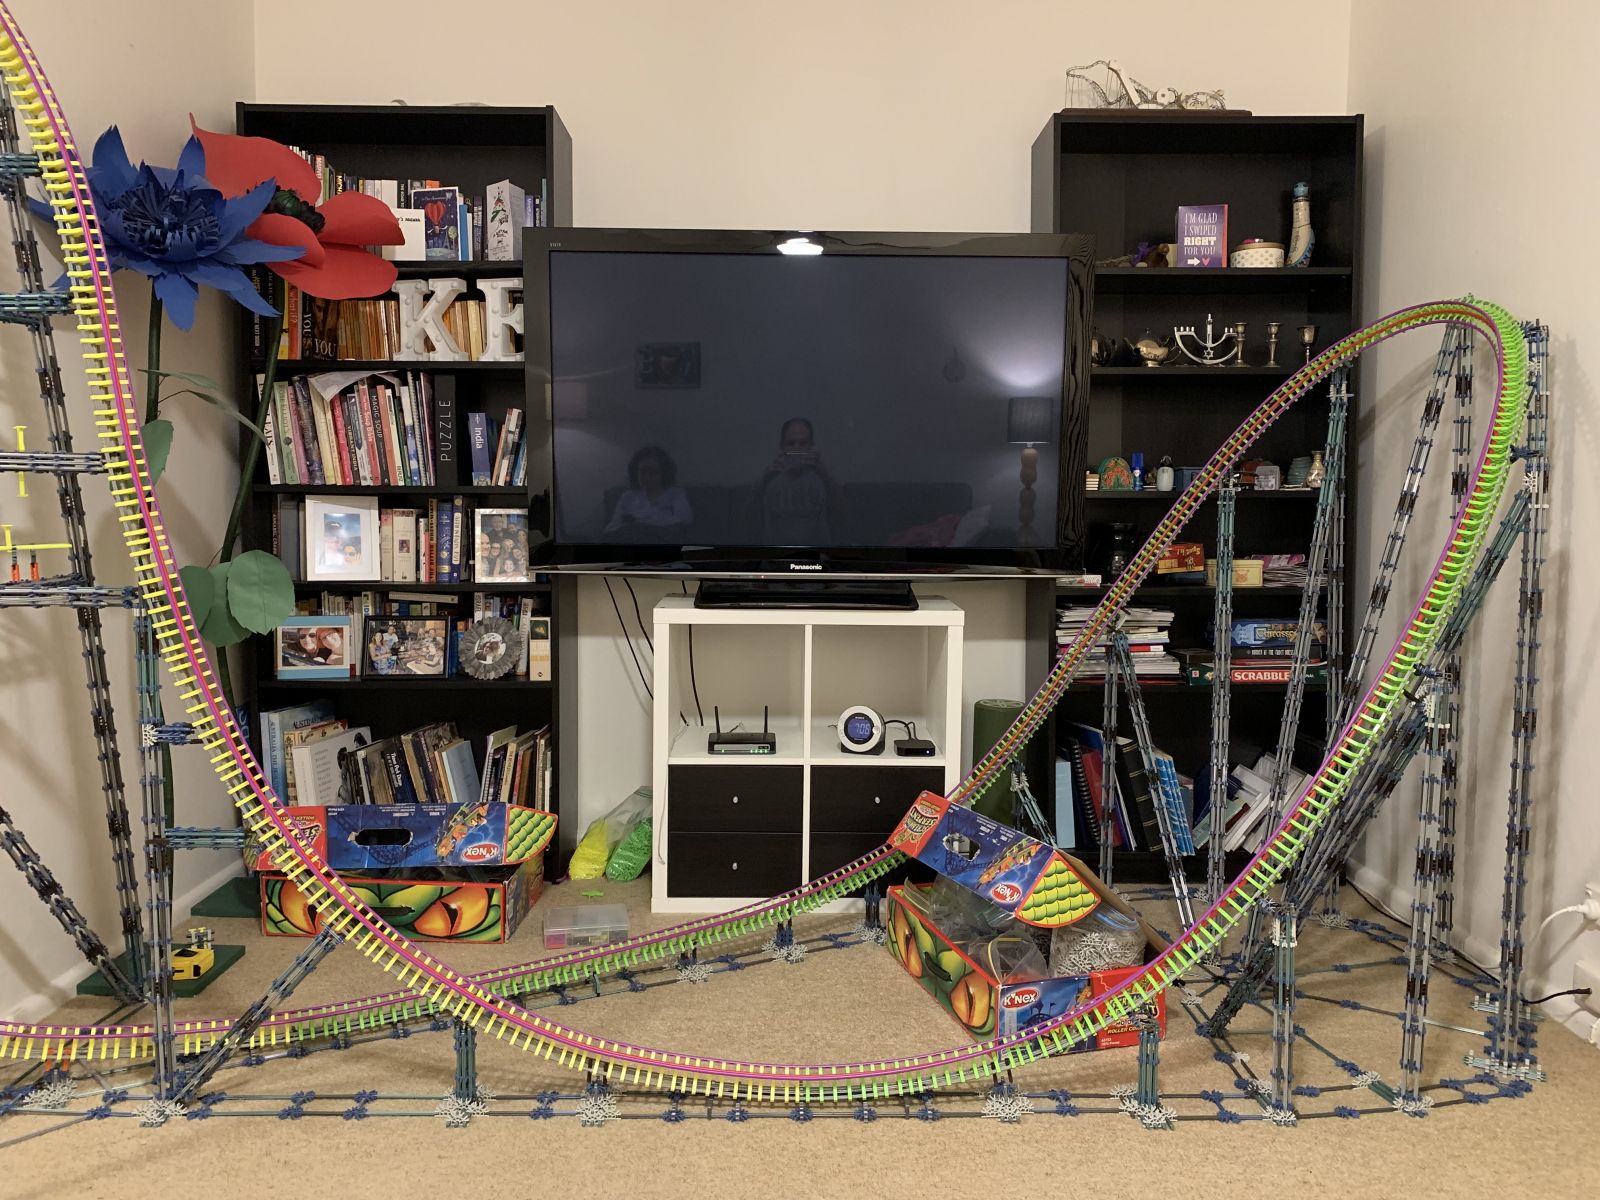
Once again another learning experience and hopefully one day we'll have a bigger house that I can do a proper recreation of DC Rivals. Therefore just have fun with this one! Now I'm thinking of a regular loop - you can see the inverted crosstie. This will preserve the speed nicely.


gallery_3157_1098_2619981.jpeg


Edited by Taipan, 19 September 2019 - 04:23 AM.


#8 RCT2123

RCT2123

    Most Rides Cancelled :-)

  • 5771 posts

Posted 19 September 2019 - 03:42 PM

[I] put so much time into the overbank gonna mark it up to a learning experience and leave it as it is.


Totally agree.  These things take a lot of effort, and slight imperfections are fine.

You have to get yourself some ball and socket joints, I don't know how you live without them.  

As for speed, yeah, these trains are just brutal for preserving it.  I'd take a look at the bearing bogies Johnny put together.  Maybe look into getting a 3d printer and making some yourself.  


Edited by RCT2123, 19 September 2019 - 03:42 PM.


  • Taipan likes this

Posted Image


#9 Taipan

Taipan

    Newbie

  • PipPip
  • 26 posts

Posted 21 September 2019 - 06:32 AM

Looked up ball joints on ebay. 25 sets for $9.99 plus $17.40 shipping to Sydney, Australia! Ouch!

My mate has a 3D printer, maybe one day will get him to print bogies for me :-D

Edited by Taipan, 21 September 2019 - 06:33 AM.


#10 Taipan

Taipan

    Newbie

  • PipPip
  • 26 posts

Posted 06 October 2019 - 03:27 AM

Finally finished the loop! Did a quick vid to show you guys  :)


gallery_3157_1098_468234.jpeg


gallery_3157_1098_376225.jpeg


#11 Britfag

Britfag

    Everybody's Russian!

  • 3818 posts

Posted 06 October 2019 - 10:39 AM

I don't know if the term Hypercoaster still suits..  ;)


The loop looks good, but would you consider the building style to be in a particular manufacturer's style? 

If it's B&M, the loop is a bit too ovular/circular, but if you're considering Intamin, it is pretty spot on.


Also why the little straight section? 


#12 Taipan

Taipan

    Newbie

  • PipPip
  • 26 posts

Posted 06 October 2019 - 03:53 PM

Lol. I've stayed with Mack & modelled the loop after Flash at Lewa Adventure which is considered to be a Hypercoaster according to rcdb.com  :)


As for the straight section my main criteria is not to obstruct the TV! Could have built the loop a bit more to the right but kept it under the drop for headchopper effects and helps to have the very top supported as well.


Flash.jpg


#13 Britfag

Britfag

    Everybody's Russian!

  • 3818 posts

Posted 07 October 2019 - 02:43 AM

I think the loop in the supports looks good - the headchopper is why I thought you went through the supports! 


Also I checked what Hypercoaster means and I was wrong! I've always used it to mean a roller coaster that doesn't invert, ie, Silver Star or Nitro, but I think that's just B&M's terminology for that ride style. 


  • Taipan likes this

#14 Nathan 310

Nathan 310

    Newbie

  • PipPip
  • 15 posts

Posted 07 October 2019 - 10:01 AM

I think your supports look great and I was impressed that there was no shaking. The track does have a few straight spots, but overall it is very impressive and quite realistic. Great job. And yes ball and socket joints are a lifesaver. I have maybe a hundred of them I bought off Ebay. I would highly recommend. Also, I am assuming you lubricated your train. If so, what lubricant did you choose?


#15 Taipan

Taipan

    Newbie

  • PipPip
  • 26 posts

Posted 07 October 2019 - 09:53 PM

Thanks mate! I’ve overengineered the supports a bit, hence no shaking. Also surprised didn’t need to add more grey rods to the track spine, 3 is enough!

I used this lubricant from my RC model helicopters, can be bought at most decent bike shops; https://www.triflowl...int-lubricator/


#16 RCT2123

RCT2123

    Most Rides Cancelled :-)

  • 5771 posts

Posted 08 October 2019 - 10:02 AM

As for the straight section my main criteria is not to obstruct the TV!


Haha, the best reason.

The loop looks good to me.  I like circular loops, they're much more forceful than B&M's.


  • Taipan likes this

Posted Image


#17 Taipan

Taipan

    Newbie

  • PipPip
  • 26 posts

Posted 08 October 2019 - 10:46 PM

It’s interesting how near circular loops are used more these days. Copperhead Strike for example although they launch it with just enough speed to go over for hangtime. Any faster would make it very forceful! Same with Full Throttle.


#18 nj_thrills

nj_thrills

    Advanced Member

  • PipPipPip
  • 30 posts

Posted 09 October 2019 - 07:06 PM

In my opinion, I think your loop could be even bigger. It would help the rest of the layout and honestly may visually look even more appealing than it already is.


#19 Taipan

Taipan

    Newbie

  • PipPip
  • 26 posts

Posted 10 October 2019 - 04:25 AM

I wanted to make the loop bigger but the support on top is in the way and to make it big enough to go over it wouldn’t have enough speed. Wouldn’t be a problem with a ball bearing train - next time!


#20 Taipan

Taipan

    Newbie

  • PipPip
  • 26 posts

Posted 06 July 2020 - 03:49 AM

Hello all, I completed my model in January. Was too busy building it to do updates. Took it down in April & just before doing so took heaps of pics and vids. Meant to edit all into one video but had issues downloading from my iphone to laptop then ran out of time. Thought to just upload a few clips and post them here :-D

I was forced to use a booster so that the train would make it to the station. Afterwards realised I’d never weighed down the train!! Rookie mistake, whoops! Another mistake was making the loop too small and wasn’t happy with the height of the elements after but was too much work to redo the loop etc.

Anyways here are the vids!


POVs below;

https://youtu.be/U01w6Iw9sA8

https://youtu.be/GTt3kKon0AA

Edited by Taipan, 06 July 2020 - 03:50 AM.


Also tagged with one or more of these keywords: ball, jester1960