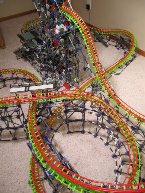
Automatic Drill Launch/Lift
With this new tutorial, the amount of time the drill stays on can be adjusted. This is done by adjusting the number of teeth on a custom gear (a snowflake connector with black rods in it).
I timed how long the power strip (which turns on the drill) stays on for each number of teeth:
8 teeth: 2.75 seconds
7 teeth: 3.25 seconds
6 teeth: Mostly 3.75 seconds, every third run lasts 4.9 seconds
5 teeth: Mostly 4.2 seconds, sometimes 5.2 seconds
4 teeth: 6.35 seconds
3 teeth: Mostly 7.25 seconds, every third run lasts 9.6 seconds
2 teeth: 13.75 seconds
1 tooth: 25.25 seconds
Note: When the number of teeth is not a factor of 8, the amount of time the power strip stays on varies each time the mechanism is run.
Note 2: Depending on your power strip and the way you position it, the amount of time your power strip stays on may be different than mine.
The tutorial:
Make sure that the blue spacers are on the right side of the grey rods. Also note that the grey rods with the blue spacers on them are not connected on the left side, because you still need to slide the battery pack for the motor onto them.

Put a rubberband around the battery pack. The rubberband should not be very stiff (it should stretch easily).


Pieces for next step


Pieces for next step


Important: There should be a space that is two blue spacers long on the left side of this rod.

The bottom of the granite rod should NOT stick into the snowflake connector.

Add the motor

Attach the rubberband that you put around the battery pack, as shown in the picture. The rubberband needs to only be tight enough to tilt the battery pack to the right slightly.

Pieces for next step

The red circles indicate where the pieces need to be added


Another view


The snowflake connector with the rods in this picture is the one that adjusts the amount of time power strip stays on. You can look up at the list I made to see how many rods to put on the snowflake connector.

Make sure that the granite rod you are adding pieces to in this step still has an empty space two blue spacers long on the bottom of it.


Another view


Make a base for your power strip to sit on. Your base may need to be different than mine to fit your power strip. You can even just tape your power strip to the floor if you want.


Now add the pieces which will flip the switch on your power strip. You may use a long grey rod or a long black rod (black rod is stiffer). The piece that will flip the switch may need to be different than mine. I used a tan connector that is slightly bigger than normal ones and is flat on top.

You want a power strip with a switch that is flat and easy to flip. It works best if you can get it to only flip the switch half-way, so that the switch doesn't click all the way into the off position, but the power strip still turns off.

Troubleshooting:
If you're having trouble with the red motor not shutting off or going into reverse, here are a few things you can try:
1: If the red motor is going into reverse, try taking the spacers off of the switch. (see picture below)
2: If your motor is not shutting off, you can try using an orange connector which is wider than standard connectors. The picture below shows where to put it:

3: Instead of using the blue rod with a blue connector for the rotating arm, you can cut a rod to the right size. It will work best if you cut the end of the rod at an angle, as shown in this picture:

If you're having trouble with the power strip turning on or off:
1: You can try shortening the arm that turns the power strip on and off, as shown in this picture:

Note: Shortening the arm may cause the power strip to not stay on as long.
2: Try repositioning the power strip a little bit. Here you can see I raised the front end of my power strip slightly by doing this:

If you have any problems or questions about anything feel free to PM me.


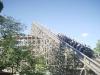
 . Seriously though, I might actually do a launched coaster for my Christmas coaster.